Installing Emacs
Org mode uses plain text files which can be used in any text editor. The real power comes when you use an environment which understands Org mode. The best place to use Org mode files is Emacs.
This beginners’ guide uses ‘plain’ Emacs. There are many Emacs distributions which pre-configure it to improve the UI, selection of installed packages, keyboard shortcuts and more. If you decide you like Emacs it is worth checking out Spacemacs and Emacs Prelude - they can add a lot of value to the Emacs experience without requiring a massive time investment.
There are no keyboard shortcuts used in this beginners’ guide. I want this to be as gentle an introduction as possible. Follow up articles will get into Org mode in more detail.

macOS
If you are using macOS, Emacs is already installed. However the bundled Emacs is ancient so you should install Emacs yourself.
There are a number of different ‘builds’ of Emacs. Feel free to look at the options - or just go ahead and install Emacs For Mac OS X which is a pretty good choice.
Linux
If you are on a recent version of Linux you probably have an up-to-date version of Emacs installed. You’ll want either Emacs 25 or Emacs 26. You can check what version you have from the command line:
emacs --version
For versions prior to 25 you should install something newer. Check your package manager to see what’s available.
Windows
The simplest way to get going with Emacs is by downloading an installer. This installer packages up the Emacs you can download from the official GNU Emacs page.
It’s not necessarily obvious which file to download. If you have a recent Windows installation (i.e. 64-bit Windows 10) then you want the file which ends -x86_64.msi. For example emacs-26.2-x86_64.msi.
The installer will add a shortcut to Emacs on your desktop, in the Start menu and from the file context menu (so you can easily open files in Emacs.)
Creating your first task list
The most obvious use for Org mode is as a task manager.
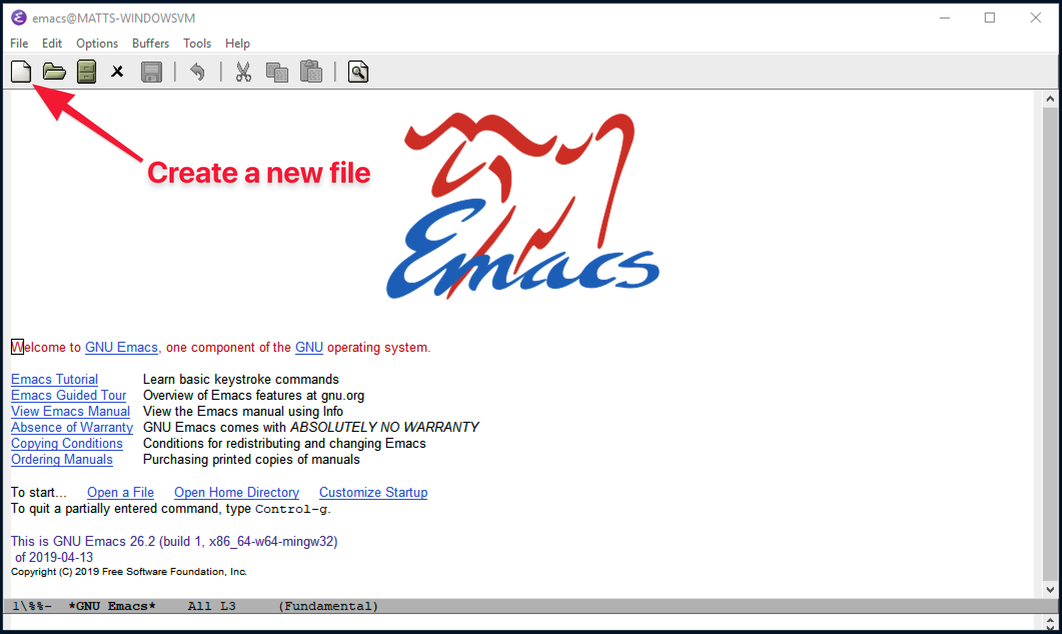
Org mode files have a .org extension. Let’s run Emacs and create a new file called tasks.org.

To create a new file tap the leftmost toolbar button, select where you want to save the file and give it the name tasks.org. The .org extension is important, as Emacs can work with lots of different sorts of files. You may want to place tasks.org on your Desktop for easy access.
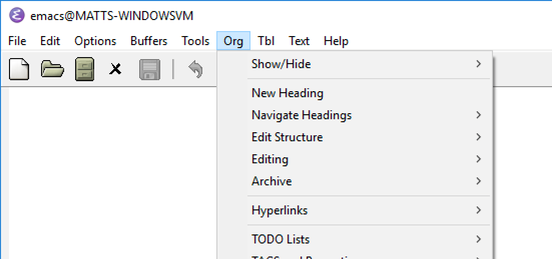
As your new file has the extension .org Emacs will automatically turn on Org mode. If you look carefully you’ll see some new menus appear in the Emacs menu bar - Org, Tbl and Text. These contain easy access to features useful for working with Org files.
From the Org menu select New Heading. Emacs will insert a * followed by a space. You can now enter the name of something you want to get done.
Go ahead and create a few tasks. Here are mine for this weekend:
* Clear out utility room
* Take utility room rubbish to recycling center
* Buy paint for utility room
A core concept in any task management system is that of a task state. Currently our list of tasks doesn’t specify the state of those tasks. As Org mode can be used as a general outliner we need to provide a little more information to make it clear that these are things to be done.
Position the cursor, using the mouse or cursor keys, on your first task.
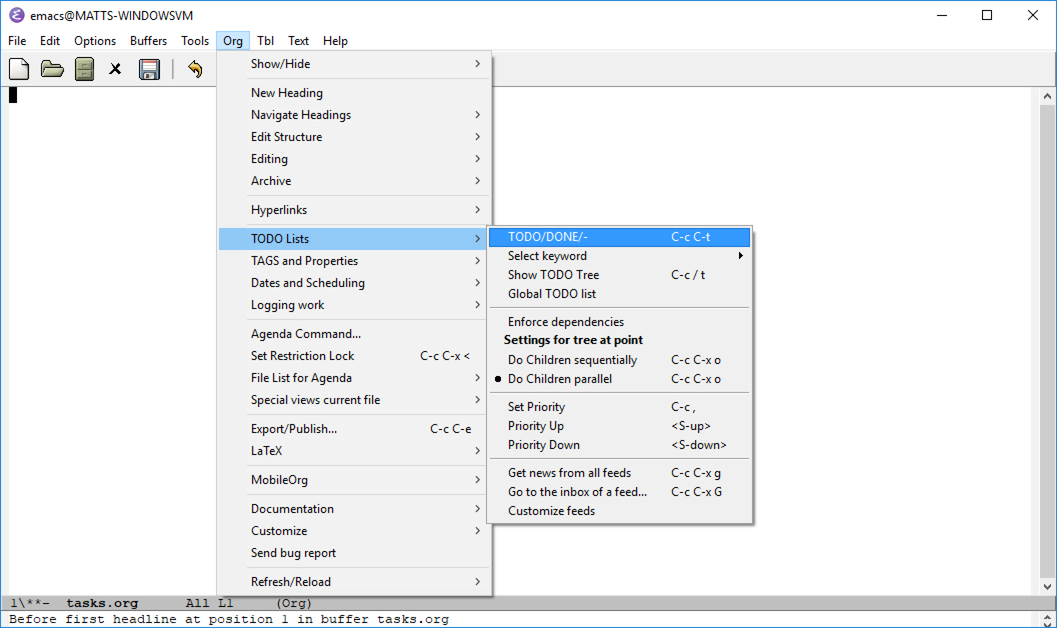
From the Org menu, select the TODO Lists submenu and then TODO/DONE/-. Emacs will insert a TODO after the *. Note that it doesn’t matter where your cursor is on the line. Emacs helpfully changes the text color of the task state.
Org files are plain text. There is nothing to stop you creating a new heading by typing the * and then setting the state by typing TODO. Until you start using keyboard shortcuts this is often quicker than using the menu if you are a reasonable typist.
Completing tasks
The state of a task is determined by the TODO keyword.
By default Org mode will understand TODO and DONE. You can cycle between the available task states using the TODO/DONE/- menu option. If an item has the state TODO and you hit TODO/DONE/- it will be changed to DONE.

Here is my list of tasks:
* TODO Clear out utility room
* TODO Take utility room rubbish to recycling center
* TODO Buy paint for utility room
I’ve now completed the first of my tasks so I’m going to set it to DONE.
Position the cursor anywhere on the line and then select the same TODO/DONE/- menu option you used before. The list now becomes:
* DONE Clear out utility room
* TODO Take utility room rubbish to recycling center
* TODO Buy paint for utility room
Scheduling tasks
You can add dates to items to say when they should be done or when a deadline is. If needed you can both schedule a task and provide a separate deadline.

Let’s schedule taking the utility room rubbish to the recycling center.
Put the cursor somewhere on the relevant line.
Bring up the Org menu, go to the submenu Dates and Scheduling and choose Schedule Item.
The Org mode date picker will appear at the bottom of the Emacs window.
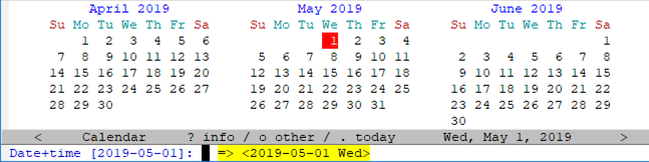
Use the mouse to pick a date this weekend (don’t worry there are quicker ways to pick dates, which we’ll learn about later). Org mode will now insert a new line below your task, which will now look something like this:
* TODO Take utility room rubbish to recycling center
  SCHEDULED: <2019-05-04 Sat>
You can clearly see the date the task is scheduled for. If you want to update it just do Schedule Item again and Org mode will update the existing date.
Saving your Org file
Org mode works with text files. You’ll need to remember to save. If you quit Emacs then it will remind you about any unsaved files.

To proactively save a file select Save from the File menu. If this is grayed out then the file doesn’t need saving.
Viewing your agenda
Once you’ve got some tasks scheduled it can be handy to see a weekly view of what needs to be done.

If you are using the agenda for the first time you’ll need to tell it which files your tasks are in.
Make sure you are viewing your tasks.org file in Emacs:
- Select the
Orgmenu - …the submenu
File List for Agenda - and then
Add/Move Current File to Front of List.
You can do this for any number of Org files you might create.
To view your agenda, first make sure that you have saved any newly created files. Then…
- From the
Orgmenu selectAgenda Command... - Press the
akey on your keyboard

You can move between weeks by selecting the Agenda menu (this only appears when you are viewing the agenda), Agenda Dates submenu and then one of the options. You’ll see next to each option a letter on the right. These can be used to quickly move about the agenda. For example when viewing the agenda press the f key on the keyboard to go to the next week.
Summary
In this article we’ve covered the following:
- Downloading and installing Emacs
- Creating your first Org file
- Adding some tasks
- Setting a task to TODO or DONE
- Scheduling a task
- Saving files
- Viewing your agenda
If you are new to Emacs or applications like Emacs (it’s a completely different world to that of Omnifocus or Things) then you might need some time to play with what we’ve looked at. It can seem a long way around to doing some quite simple things. However once you progress onto using the keyboard everything changes and the true power of Org mode and Emacs will be revealed.
Check back soon for next part of Learning Org mode
