beorg uses the outliner for quick capture, creating and editing tasks and notes, and viewing files.
The information on this page is for the outliner introduced in beorg 2026.9.
beorg can also be configured to use the item editor instead of the outliner. However, the item editor is now deprecated and will be removed in a future version of beorg.
What is an outline?
A file is shown as an outline. An outline is an organized hierarchy of text. You may sometimes see items in an outline referred to as nodes. An item can contain other items, known as its children. A headline can also contain text. Here is an example of what beorg writes when you save a file you’ve been working on:
* Headline 1
** Headline 1.1
Some text belonging to headline 1.1
** Headline 1.2
* Headline 2
Folding
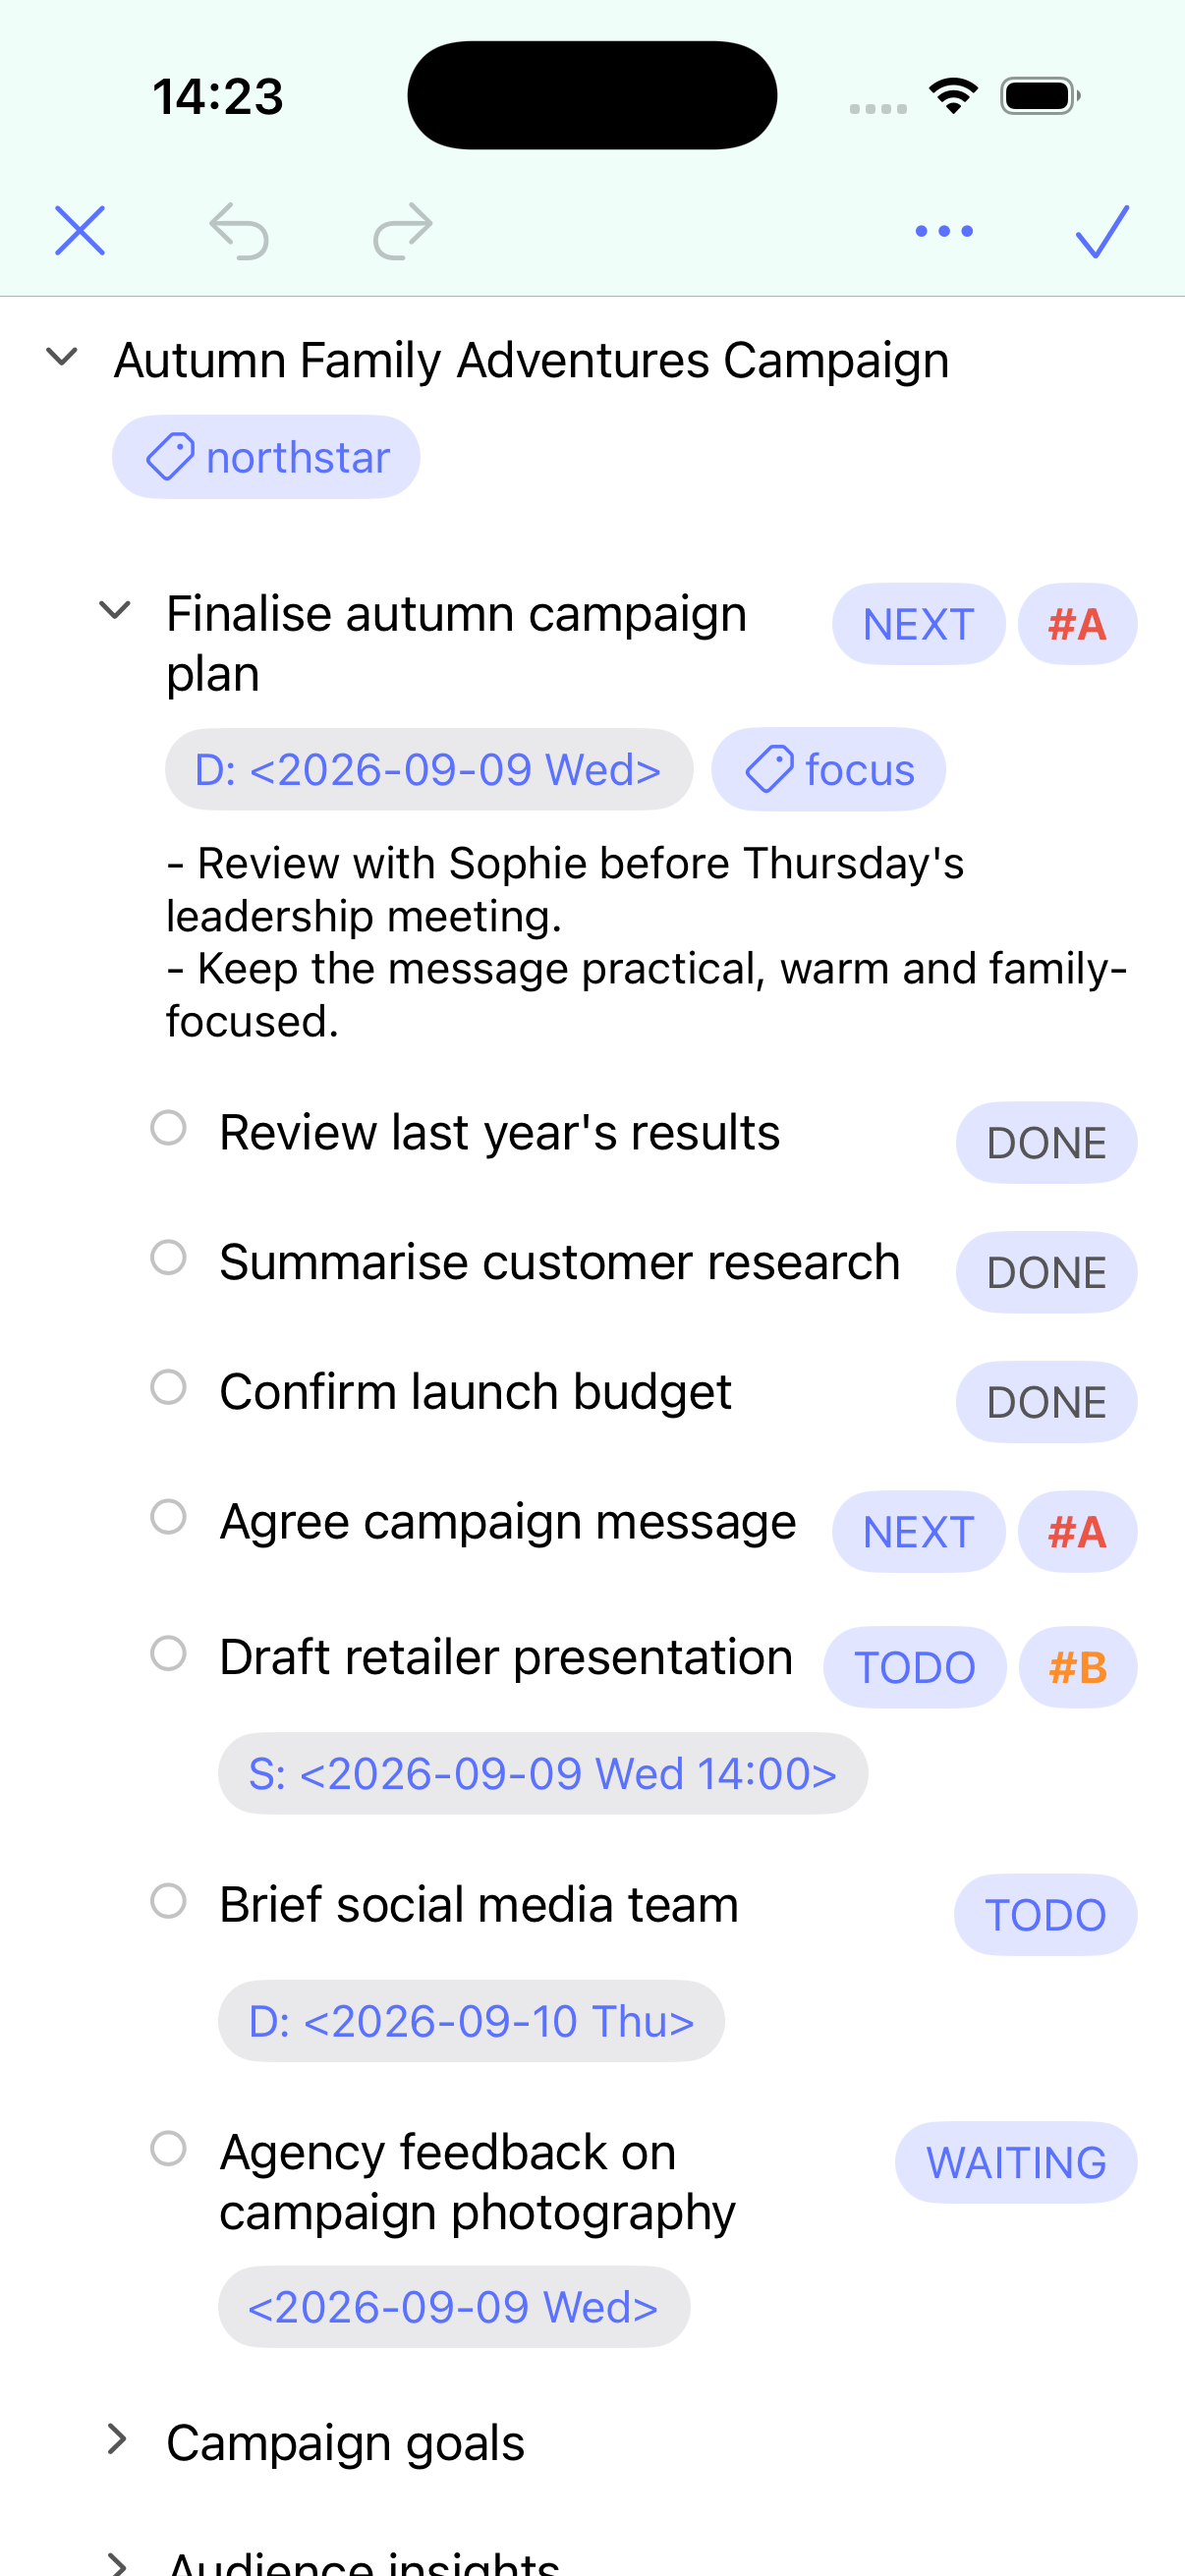
beorg allows you to fold an item in the outline (that is, show or hide its children). To show or hide the children of an item, tap the headline on the left-hand side of the screen. You can tell if an item’s children are hidden because it will contain a triangle pointing right. If its children are shown, the triangle will point down. An item with no children will appear as an empty circle.
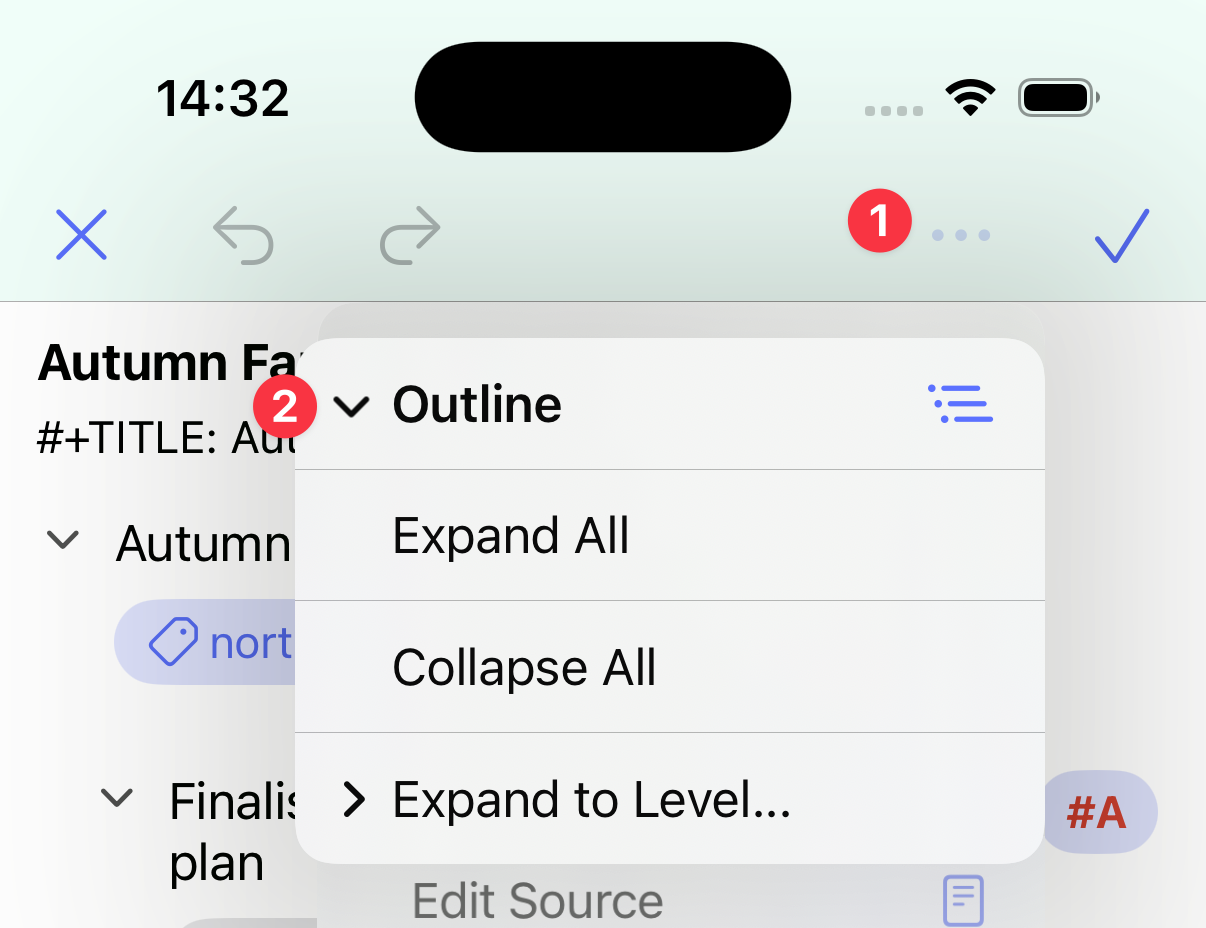
You can quickly fold or unfold all headlines, or unfold to a particular level. Tap the menu button at the top of the screen and select Outline.
Editing
If you create a new file and open it in the outliner, you’ll see:
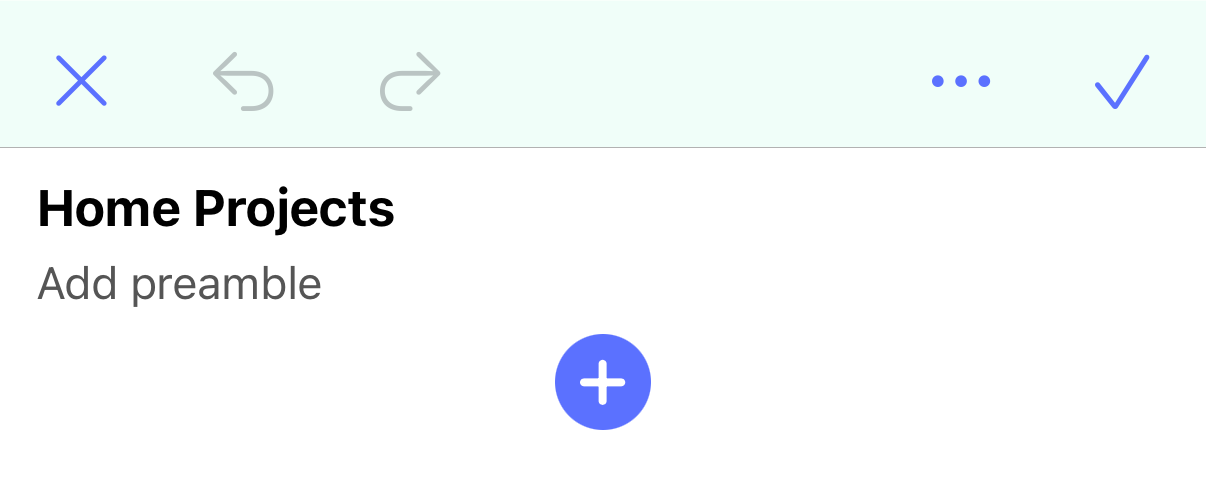
- The name of the file
- A place to add text above the headlines (the preamble)
- A button to add a new headline
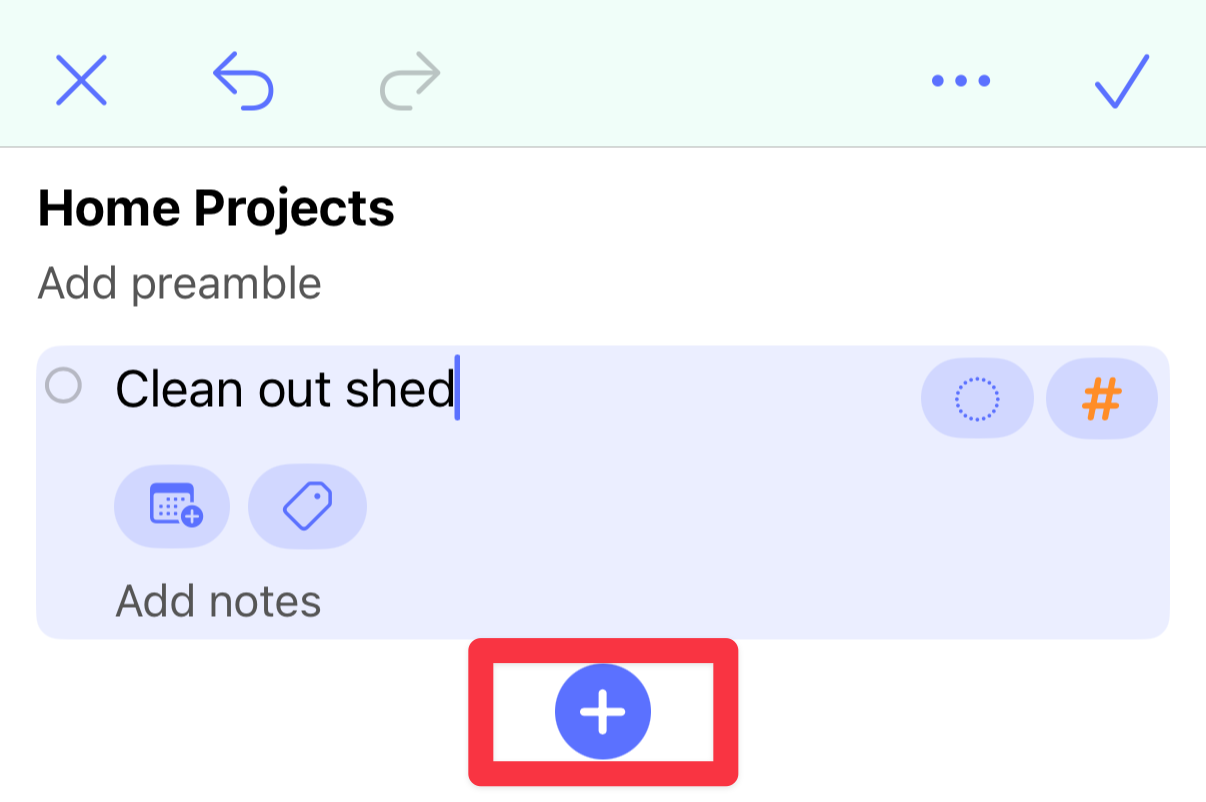
If you add a new headline, the keyboard will appear, and you can type the headline text. In the example below, the text “Clean out shed” has been typed.
Headline attributes
A headline can have:
- A state, such as TODO or DONE
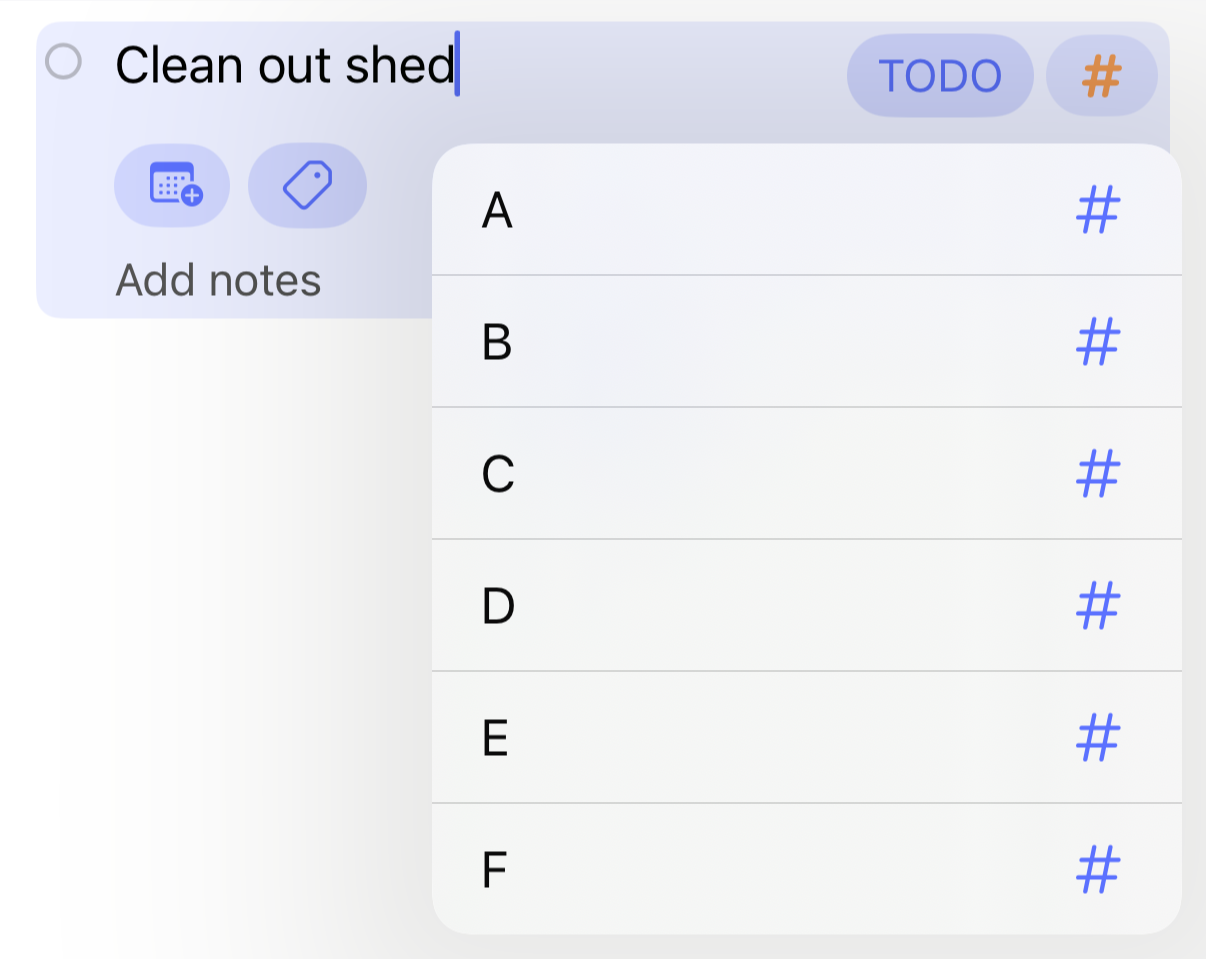
- A priority, with A being the highest and F the lowest
- Dates, such as when the task represented by this headline is scheduled
- Tags, for example Shopping
- Notes
- Children, that is headlines contained within this headline
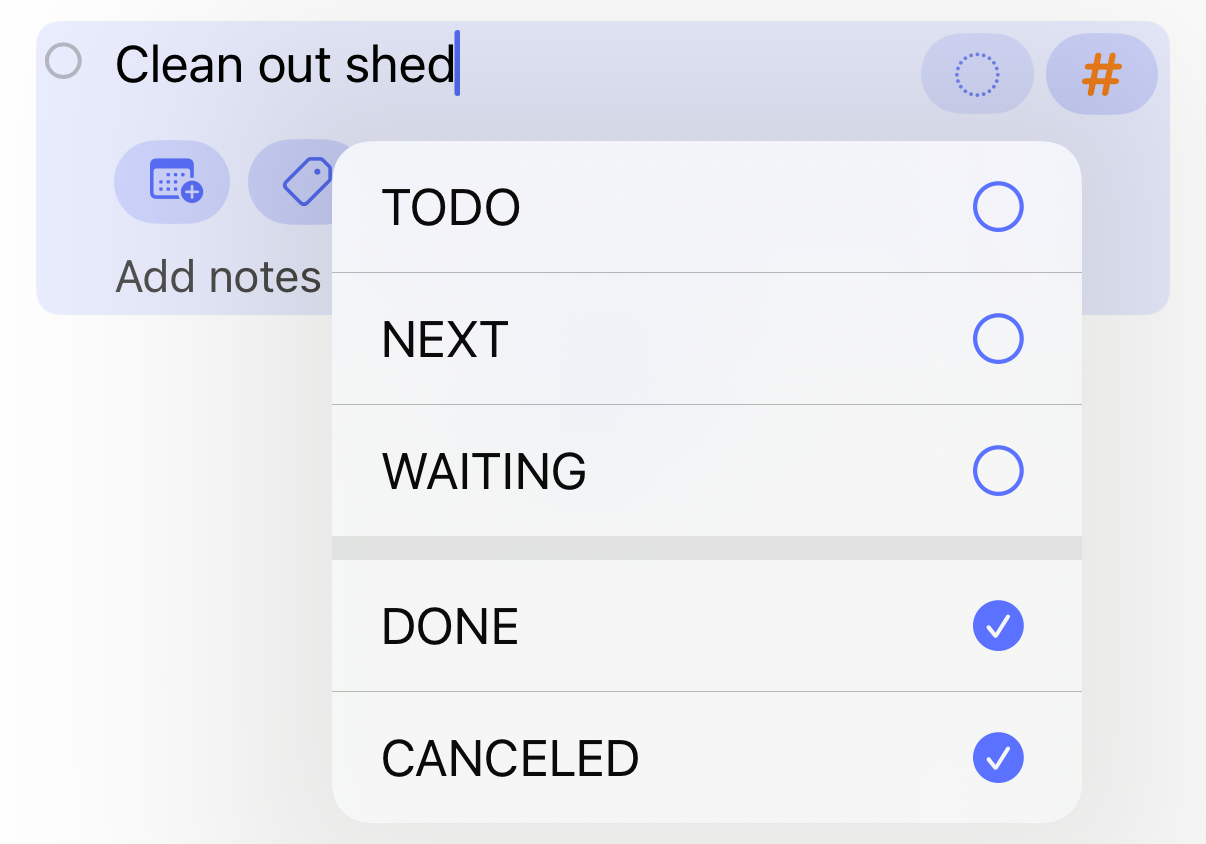
To set the state for the headline, tap the button to the right of the headline text and select the state to assign. From the Settings tab, you can tell beorg what states you want: states representing a task that hasn’t yet been completed, such as TODO, and states representing a completed task, such as DONE.
To change the priority, tap the button to the right of the state button.
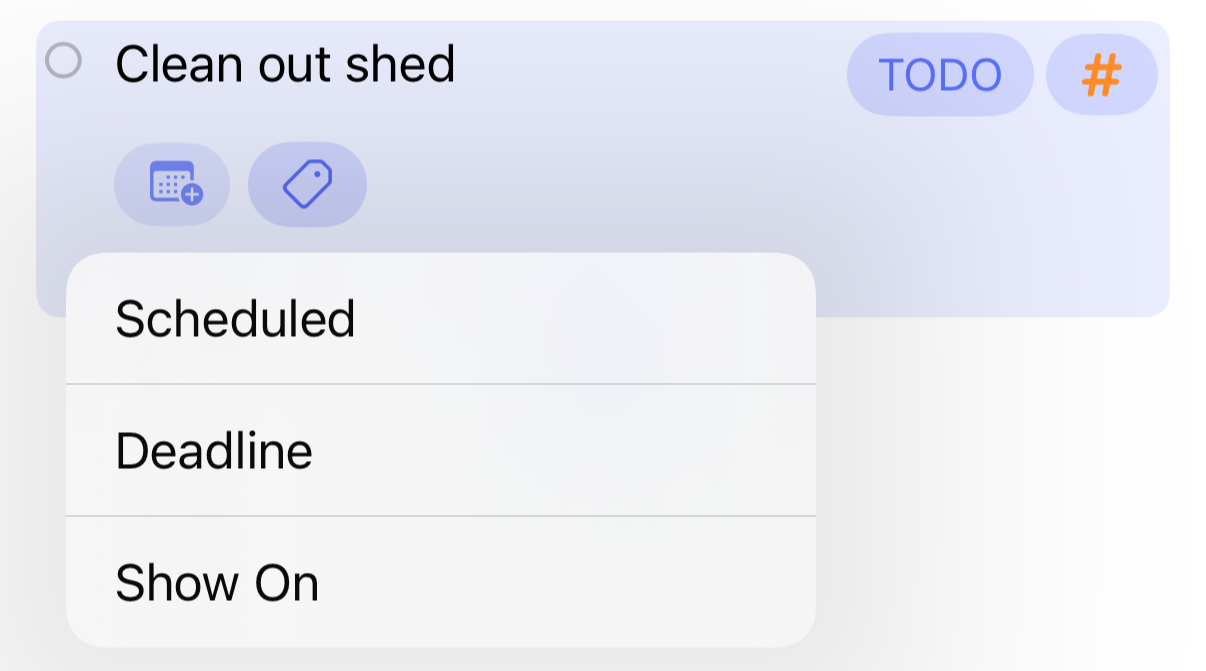
beorg supports three different kinds of dates:
- Scheduled, that is when you want to start work on a task
- Deadline, when a task should be completed by
- Show on, when you want the task to appear in the agenda without necessarily any expectation of anything happening to the task
To add a date, tap the first button underneath the headline and select the type of date you want to add.
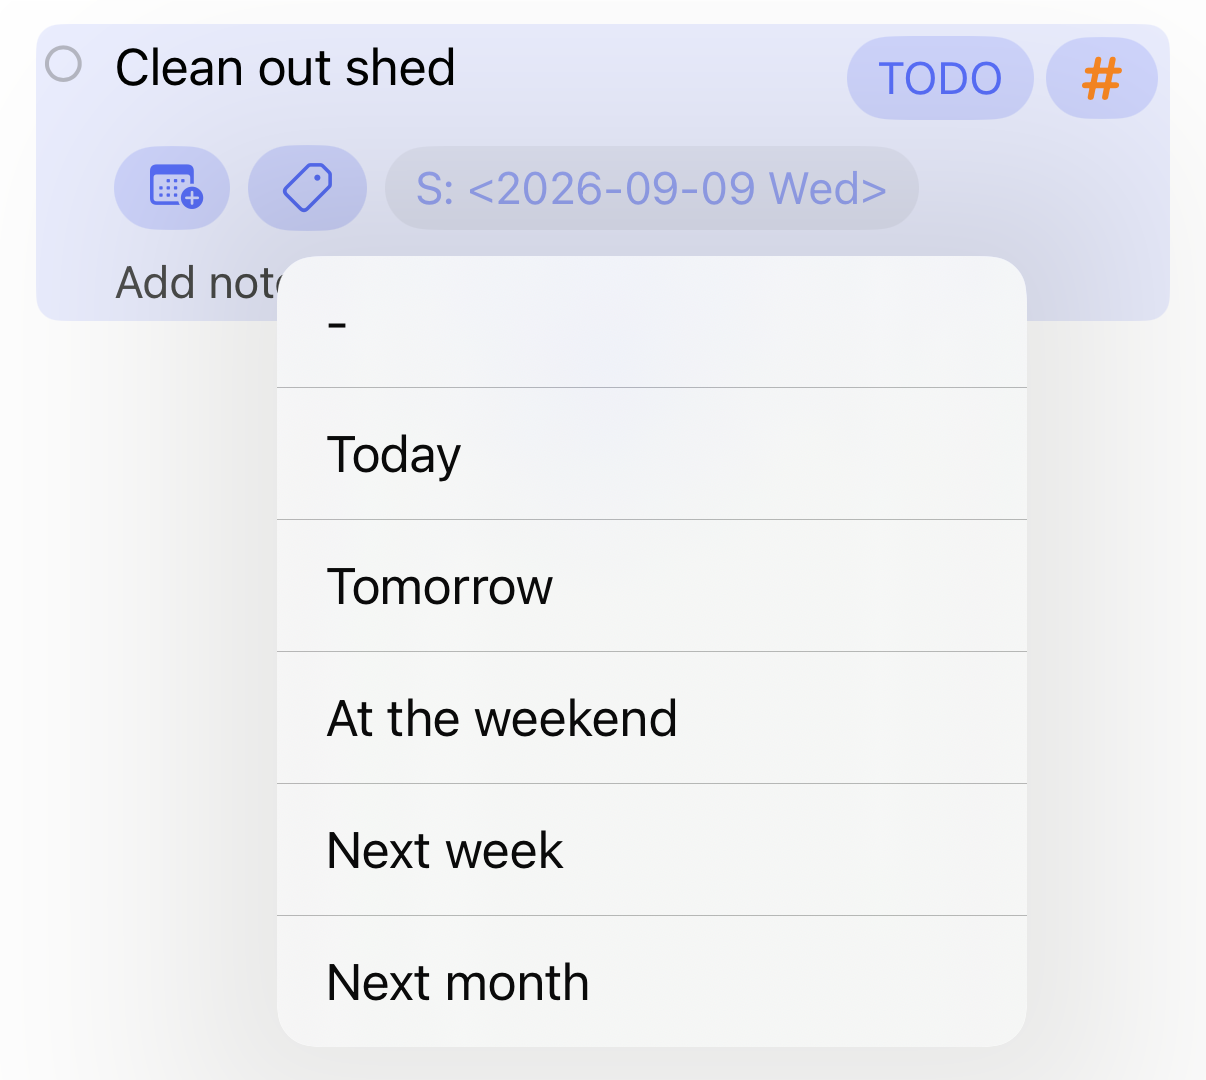
Added dates will appear to the right of the tag button. You can tap a date to change it, or long-press for a menu to more quickly update the date to something else.
Tags help you categorize headlines and filter a mixed list of tasks. Useful categories include:
- Context or people: @home, @office, @phone, @family, @client
- Type of work or project: coding, admin, planning, beorg, house
- Effort or time: deep-work, quick, low-energy, 15min, 1hour
- Status or opportunity: waiting, blocked, delegated, someday, weekend
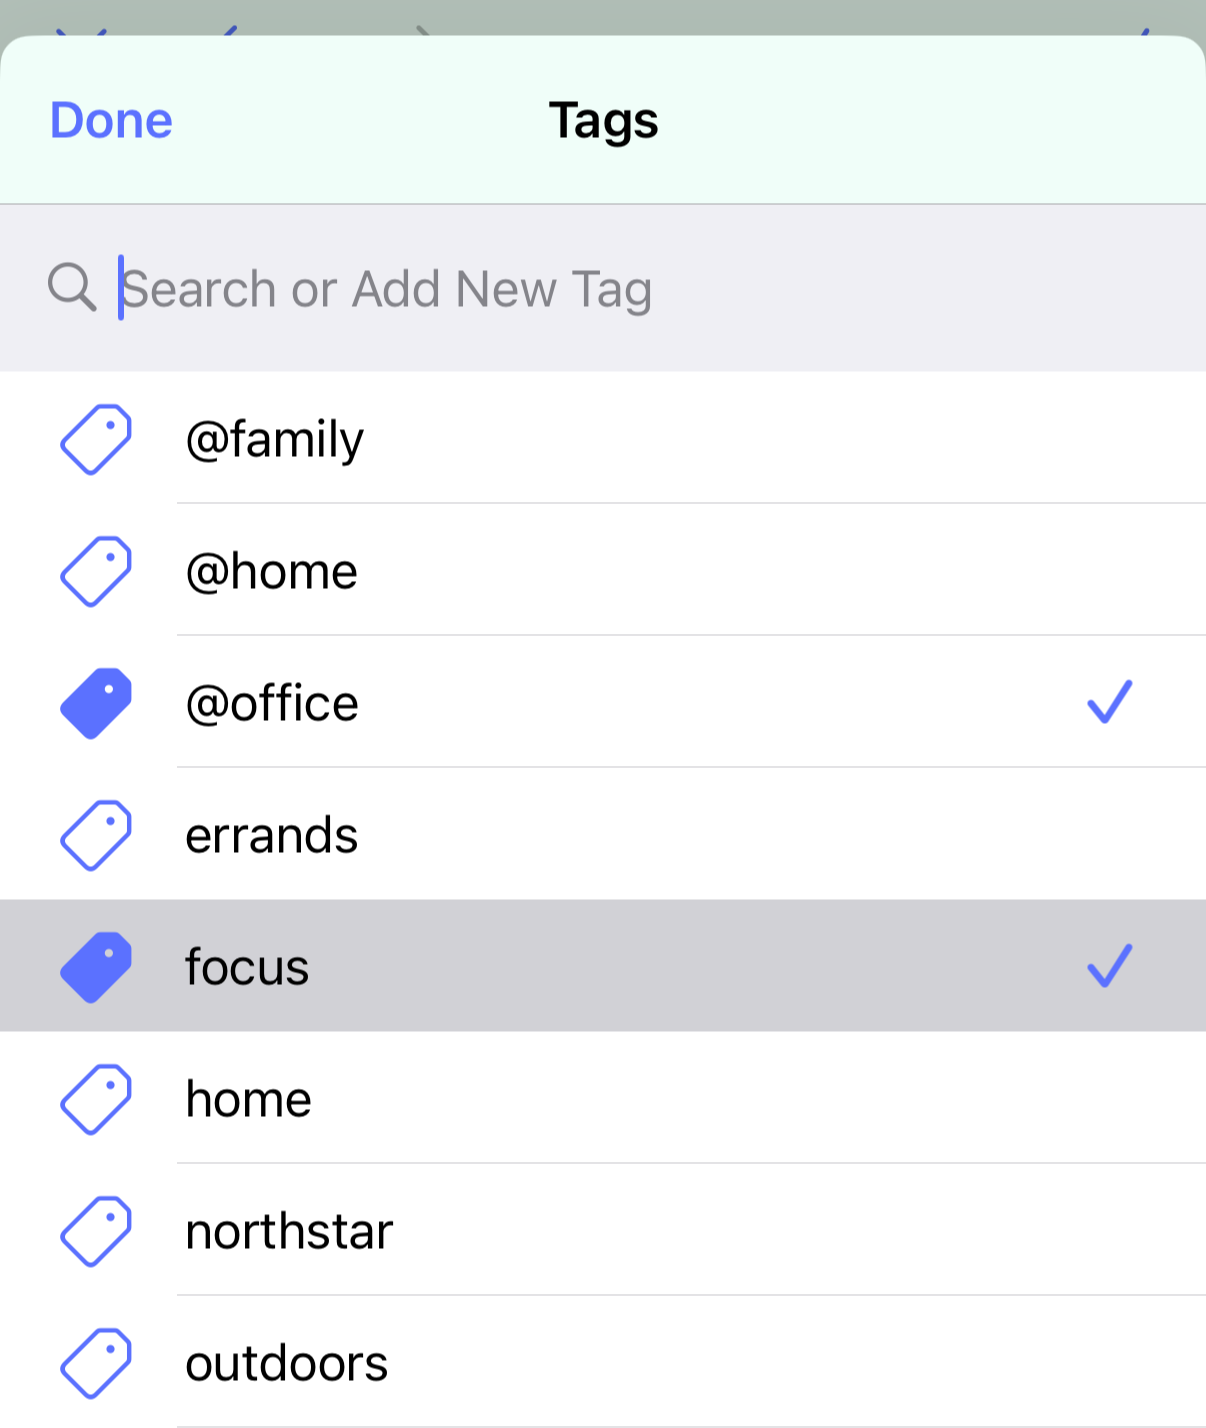
To add a tag, tap the tag button. You’ll be shown the tag manager. You can select existing tags, or add new tags.
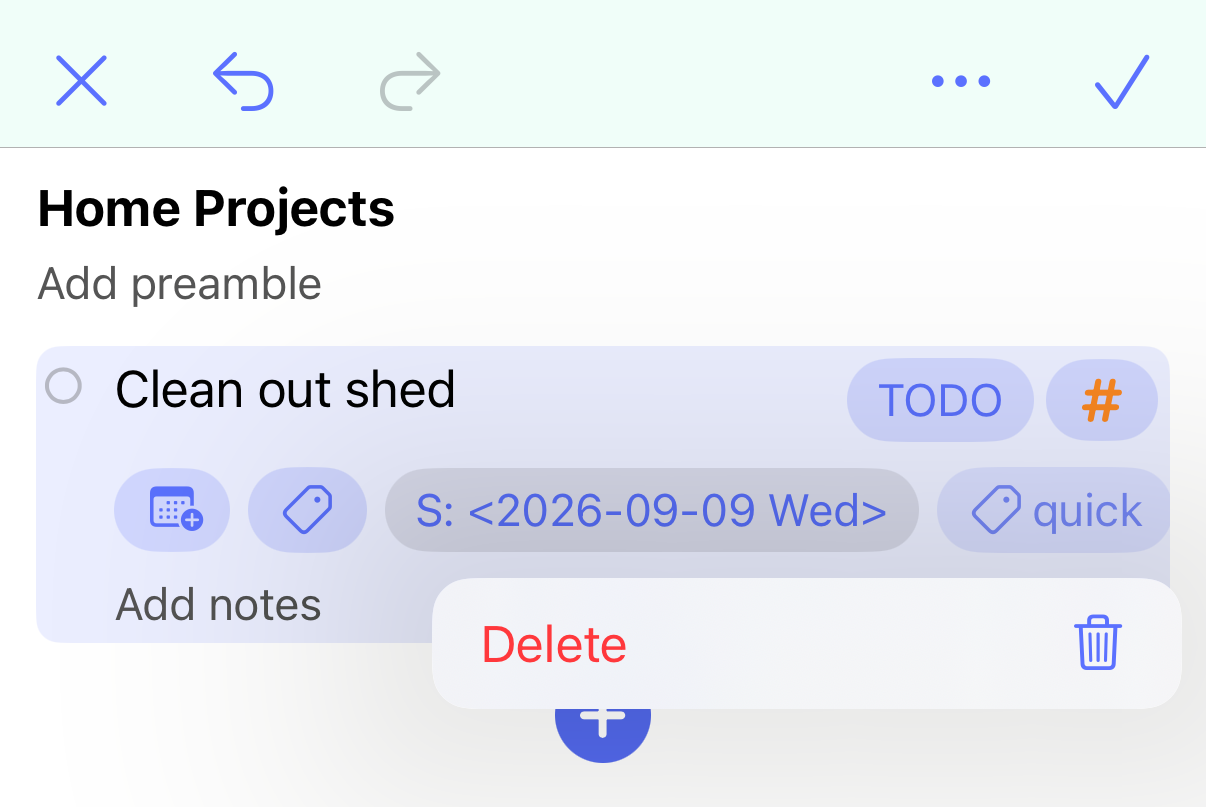
Added tags will appear to the right of any dates. You can horizontally scroll this row to access all of the dates and tags.
To quickly delete a particular tag, long-press the tag and select Delete from the menu.
Editing a headline
When you tap a headline’s text or notes, the keyboard will appear.
To quickly add a new headline below the current one, tap the return key. You can start typing straight away to add text to the new headline.
To quickly delete the current headline, use the delete key to delete the headline text and then tap delete once more (once no more text remains) and the headline will be removed. The previous headline will now be highlighted and you can continue editing using the keyboard. If the headline has any notes or children you can’t delete it this way.
Above the keyboard will be a toolbar. This has the following buttons:
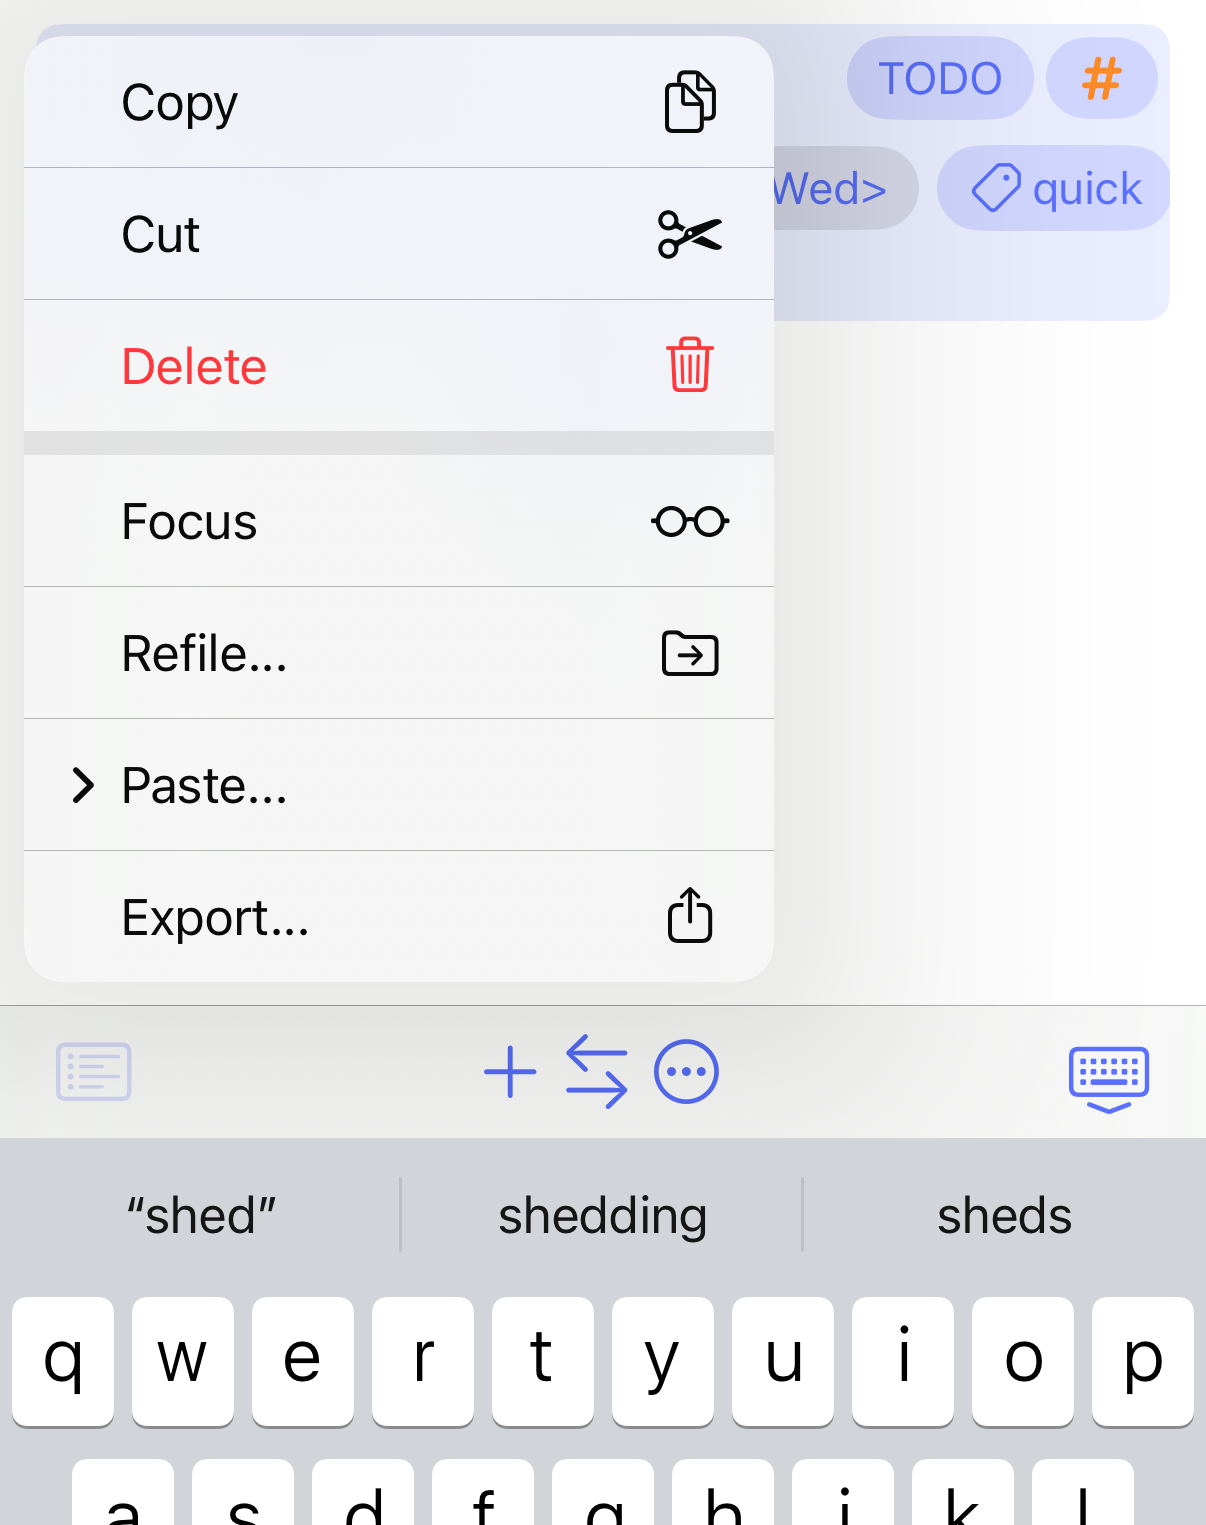
- The headline menu. This can also be shown by long-pressing a headline you aren’t actively editing.
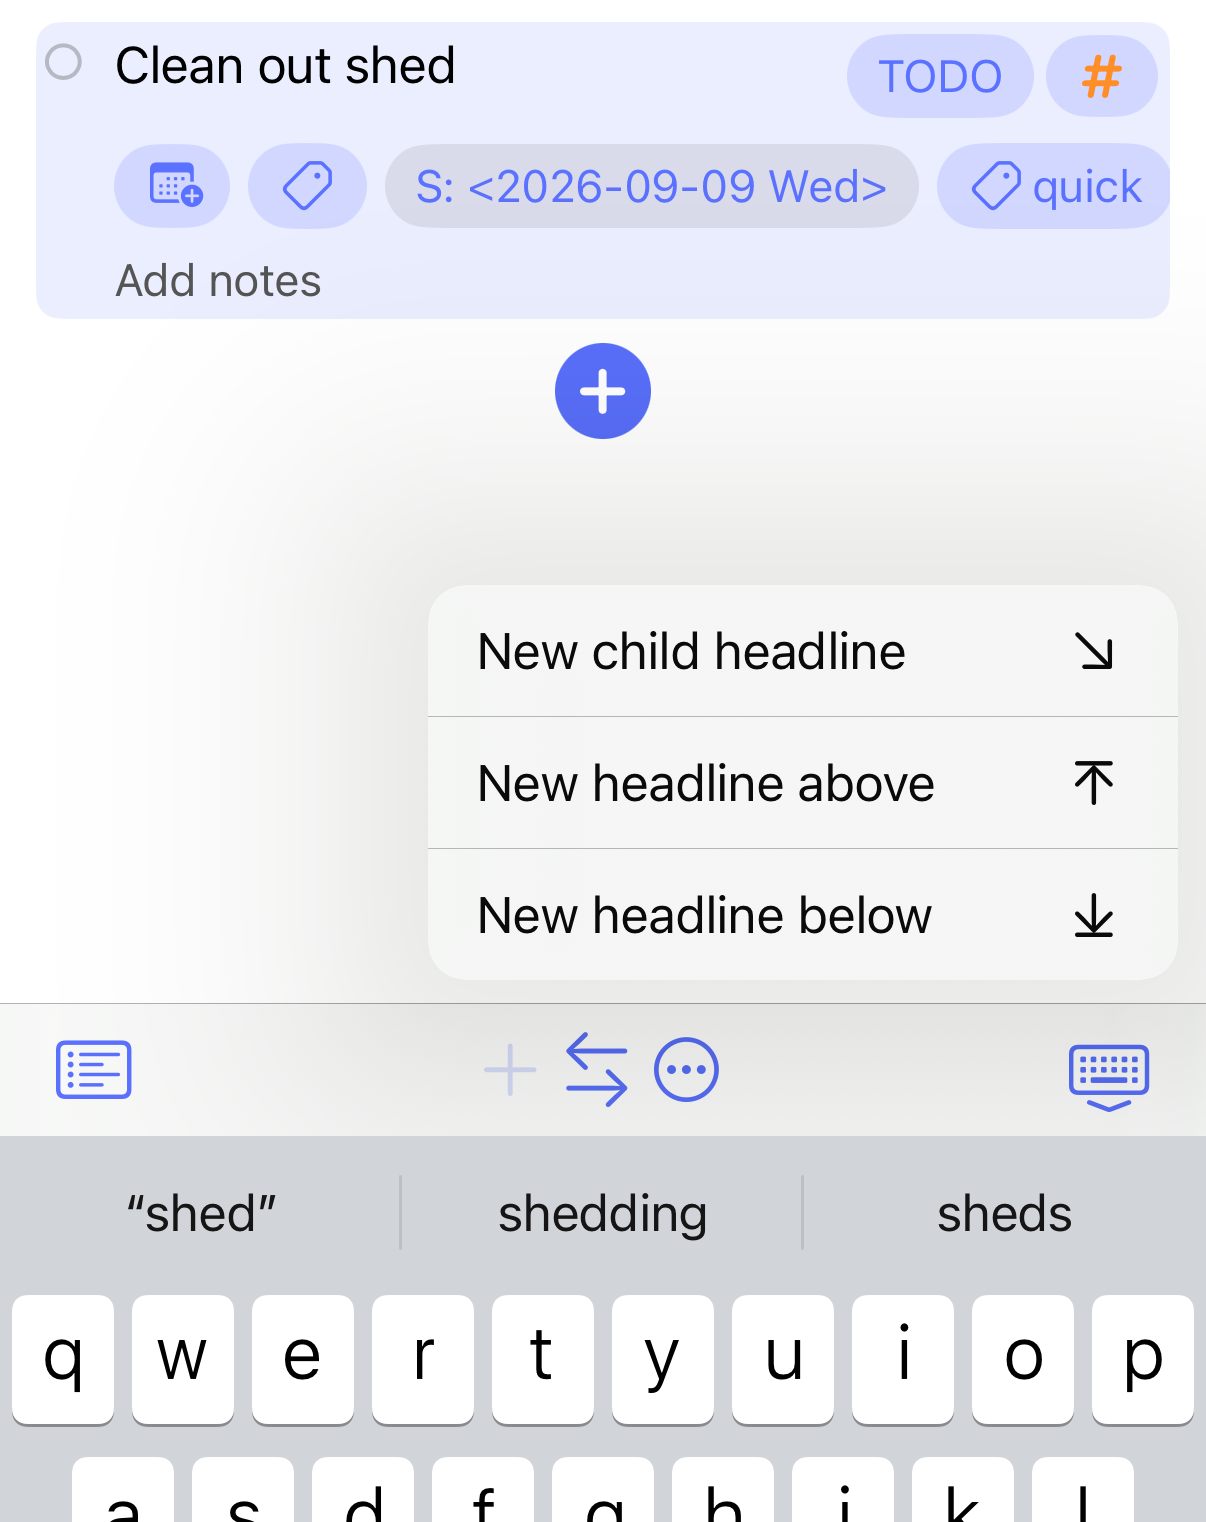
- The add menu. This allows you to add a new headline below, a new headline above or a child headline inside the current headline.
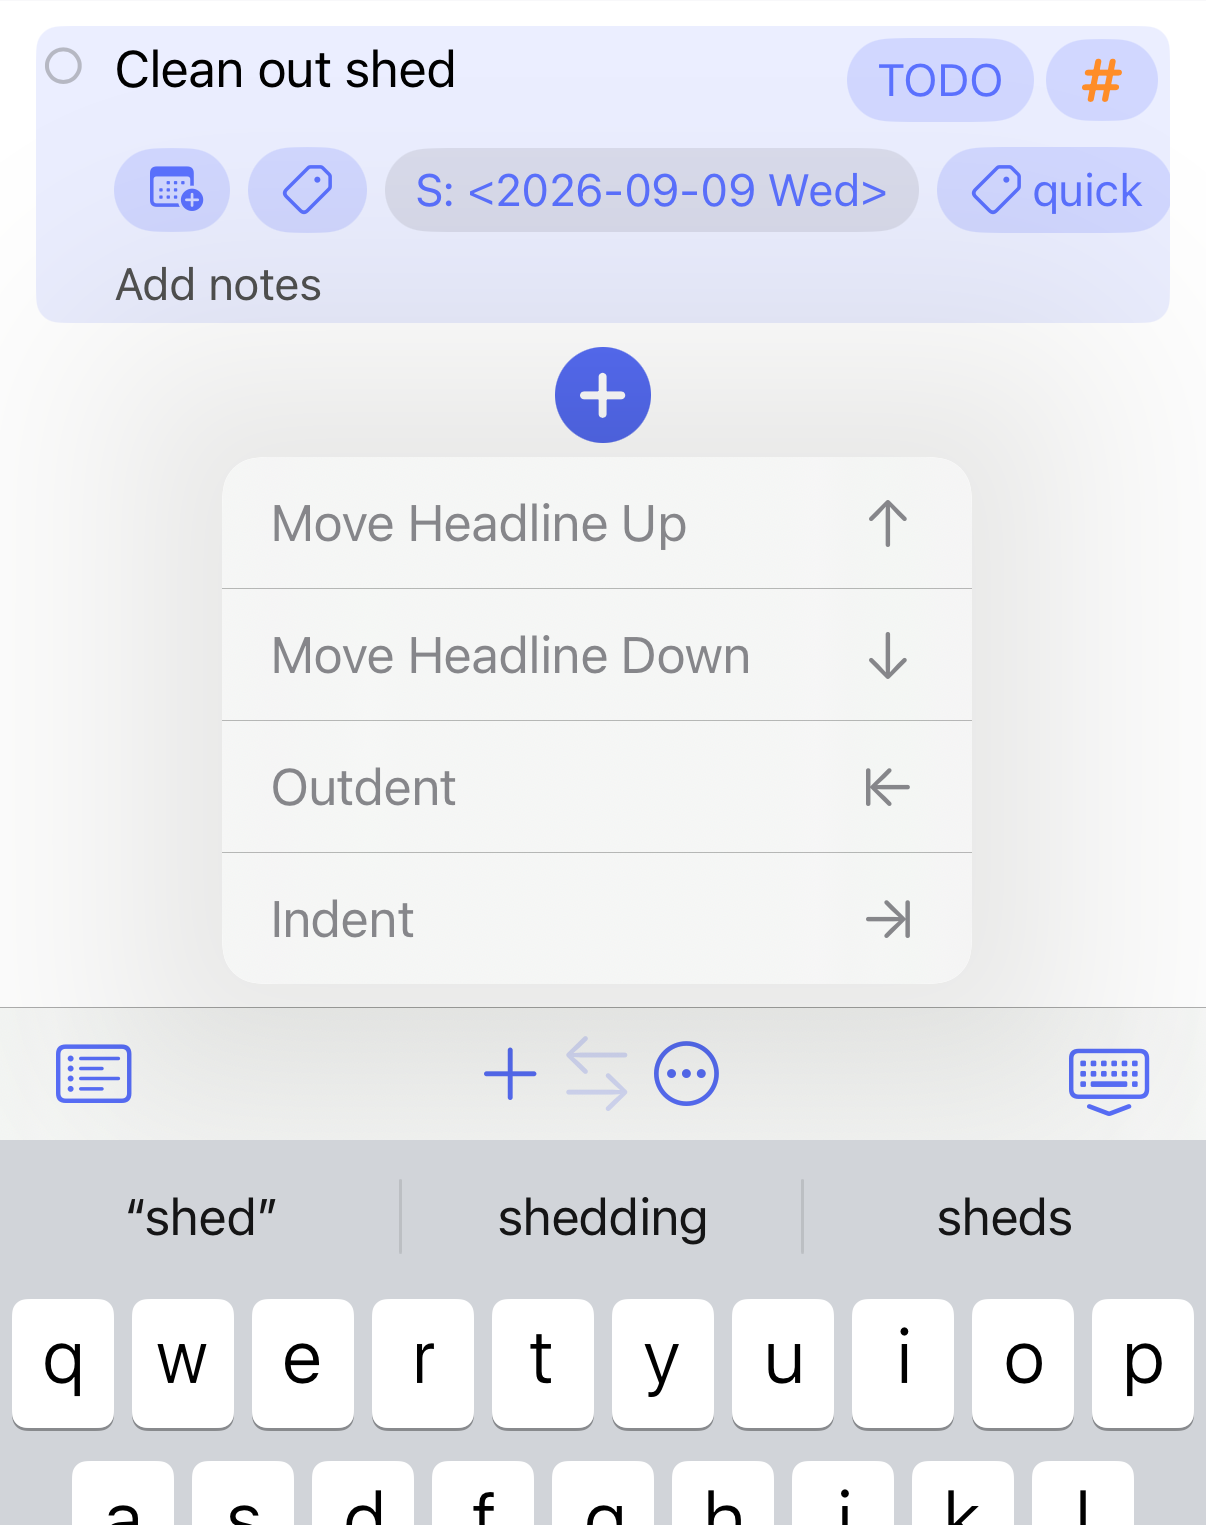
- The arrange menu. Easily move the current headline up or down, outdent it (i.e., make it a higher-level headline), or indent it (make it a child of the headline above). One or more of these items will be disabled if they aren’t currently applicable.
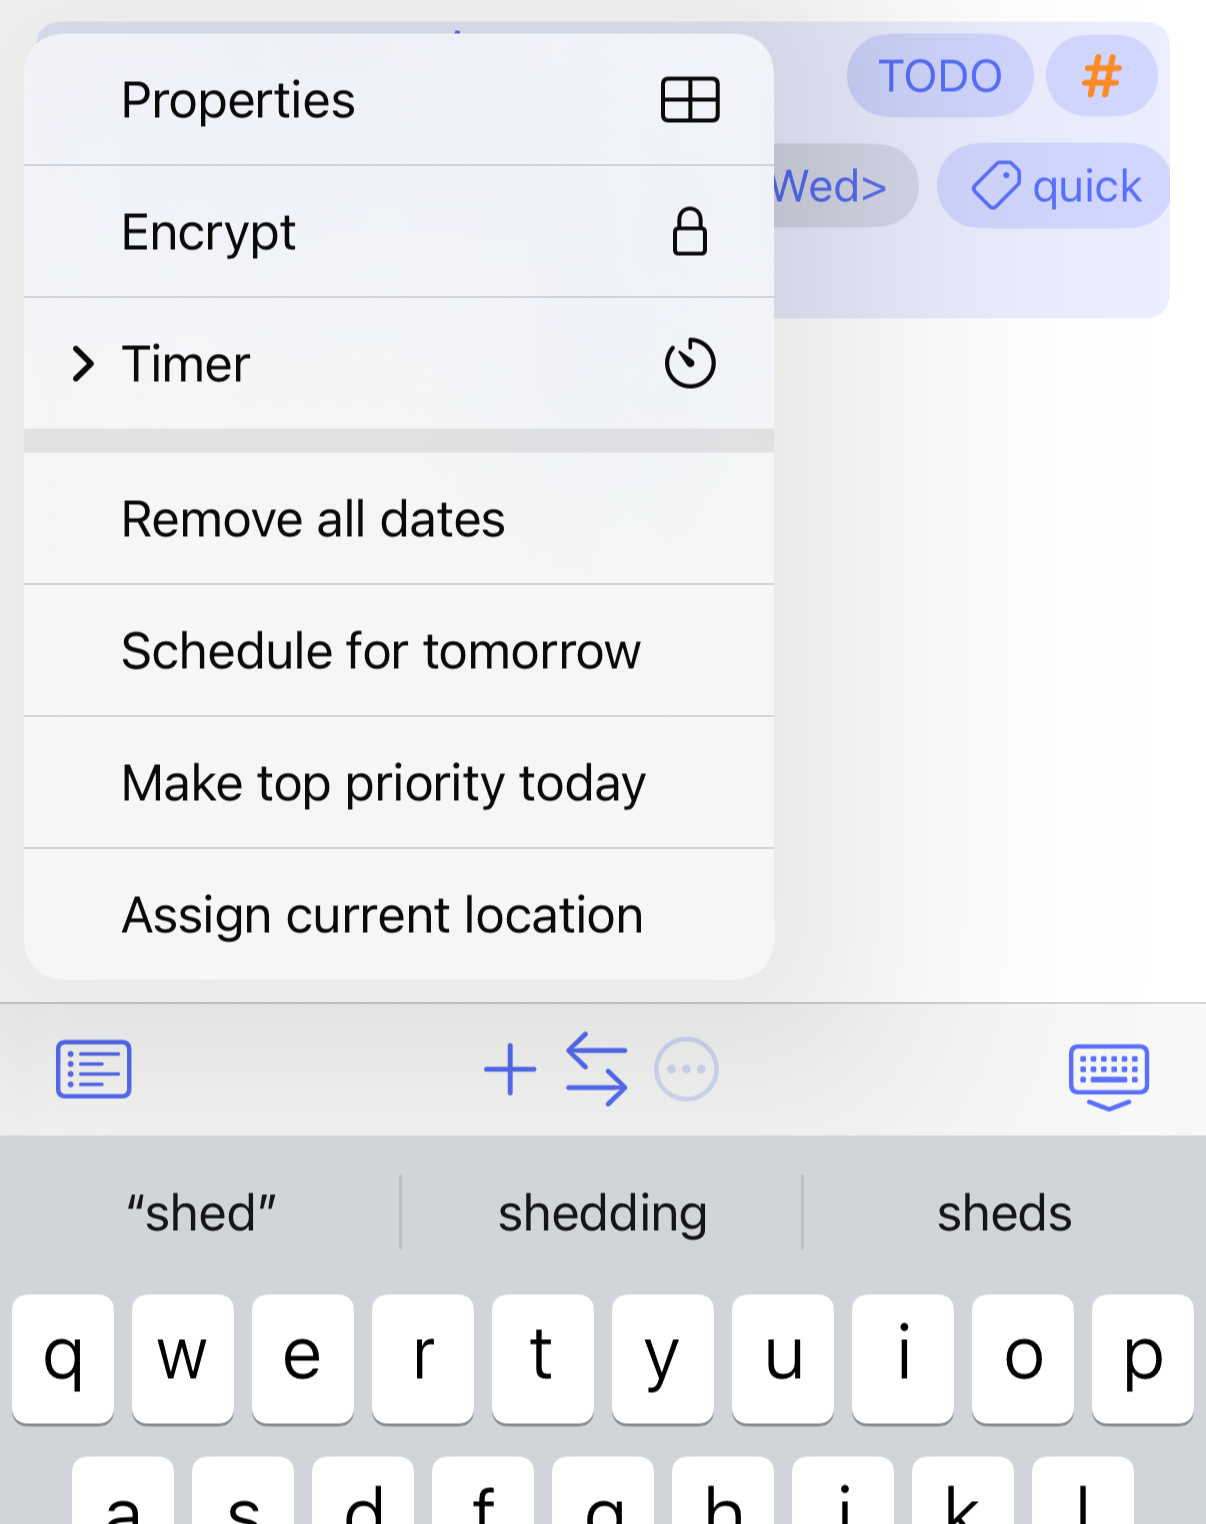
- A menu to show other useful items. This includes properties, encrypt and actions to start a timer or view a time report.
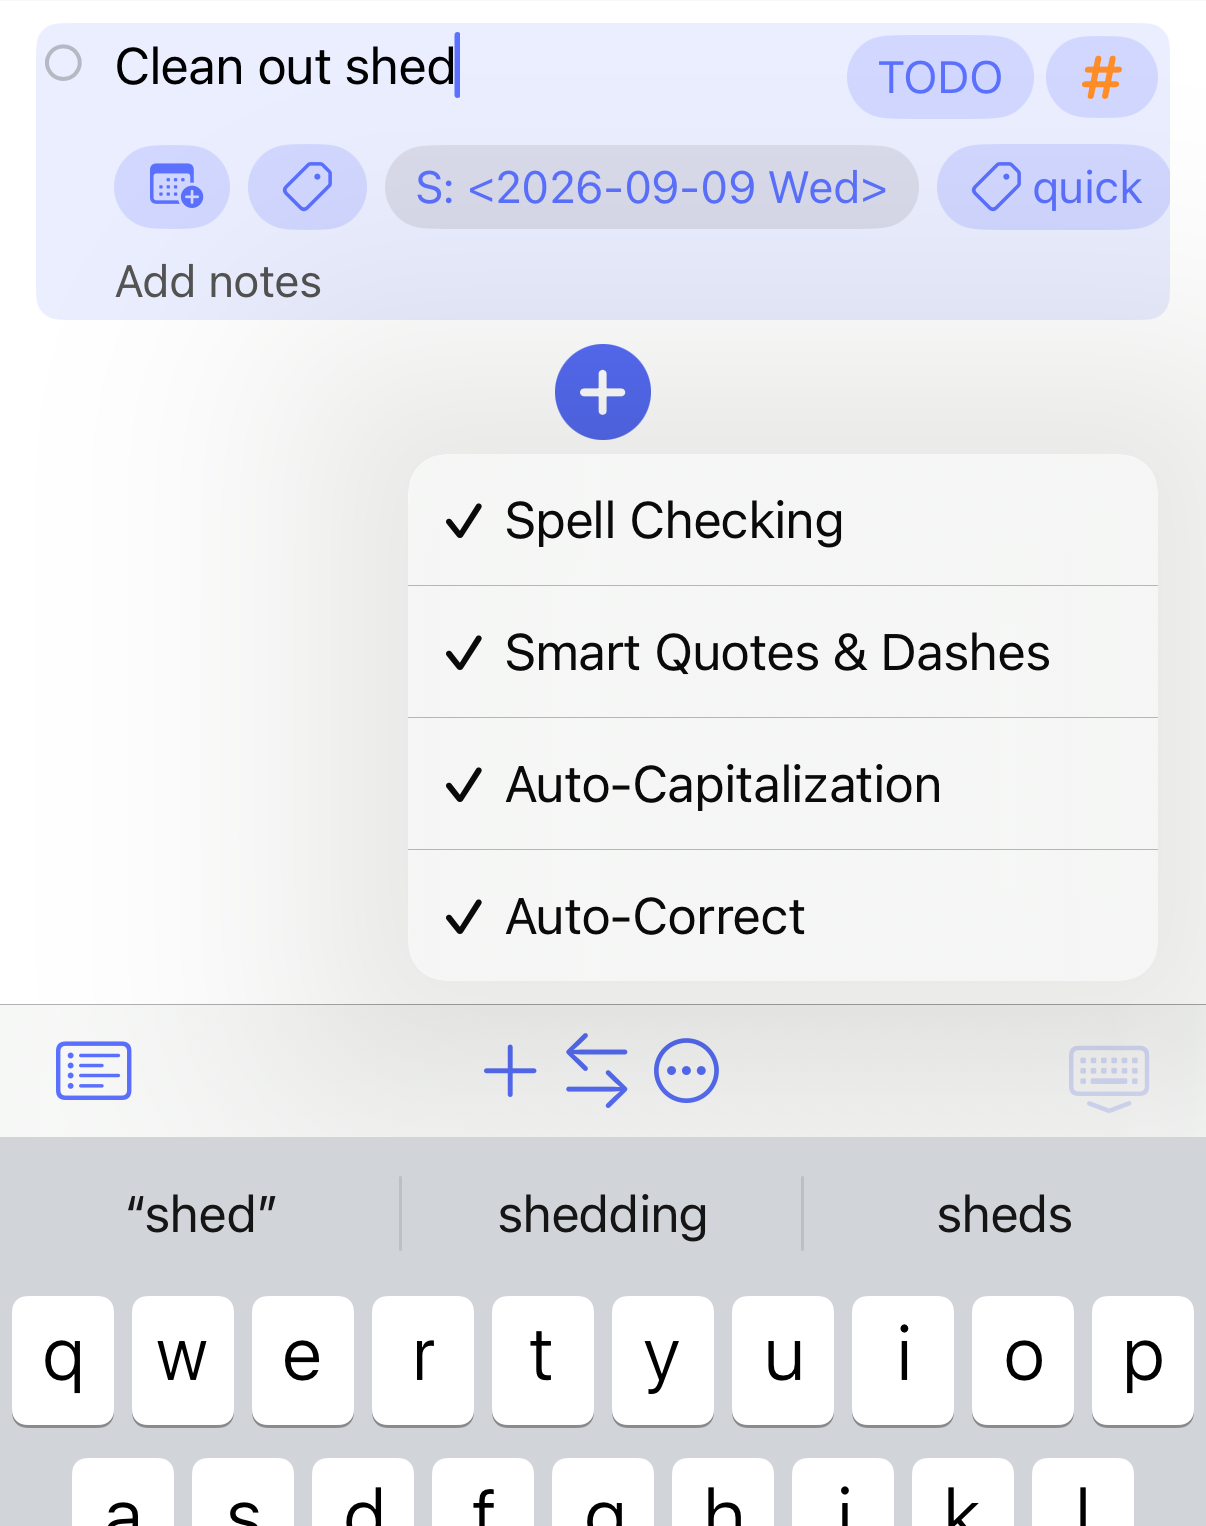
- The keyboard menu. Tapping this will dismiss the keyboard. Long-pressing it will allow you to turn spell checking, smart quotes and dashes, auto-capitalization, and auto-correct on or off.
Focus
In a large outline it can be useful to focus a headline. This hides everything else, and lets you focus on what you’re working on right now.
To focus a headline, long-press the headline (or if actively editing the headline, tap the headline menu button above the keyboard) and tap Focus.
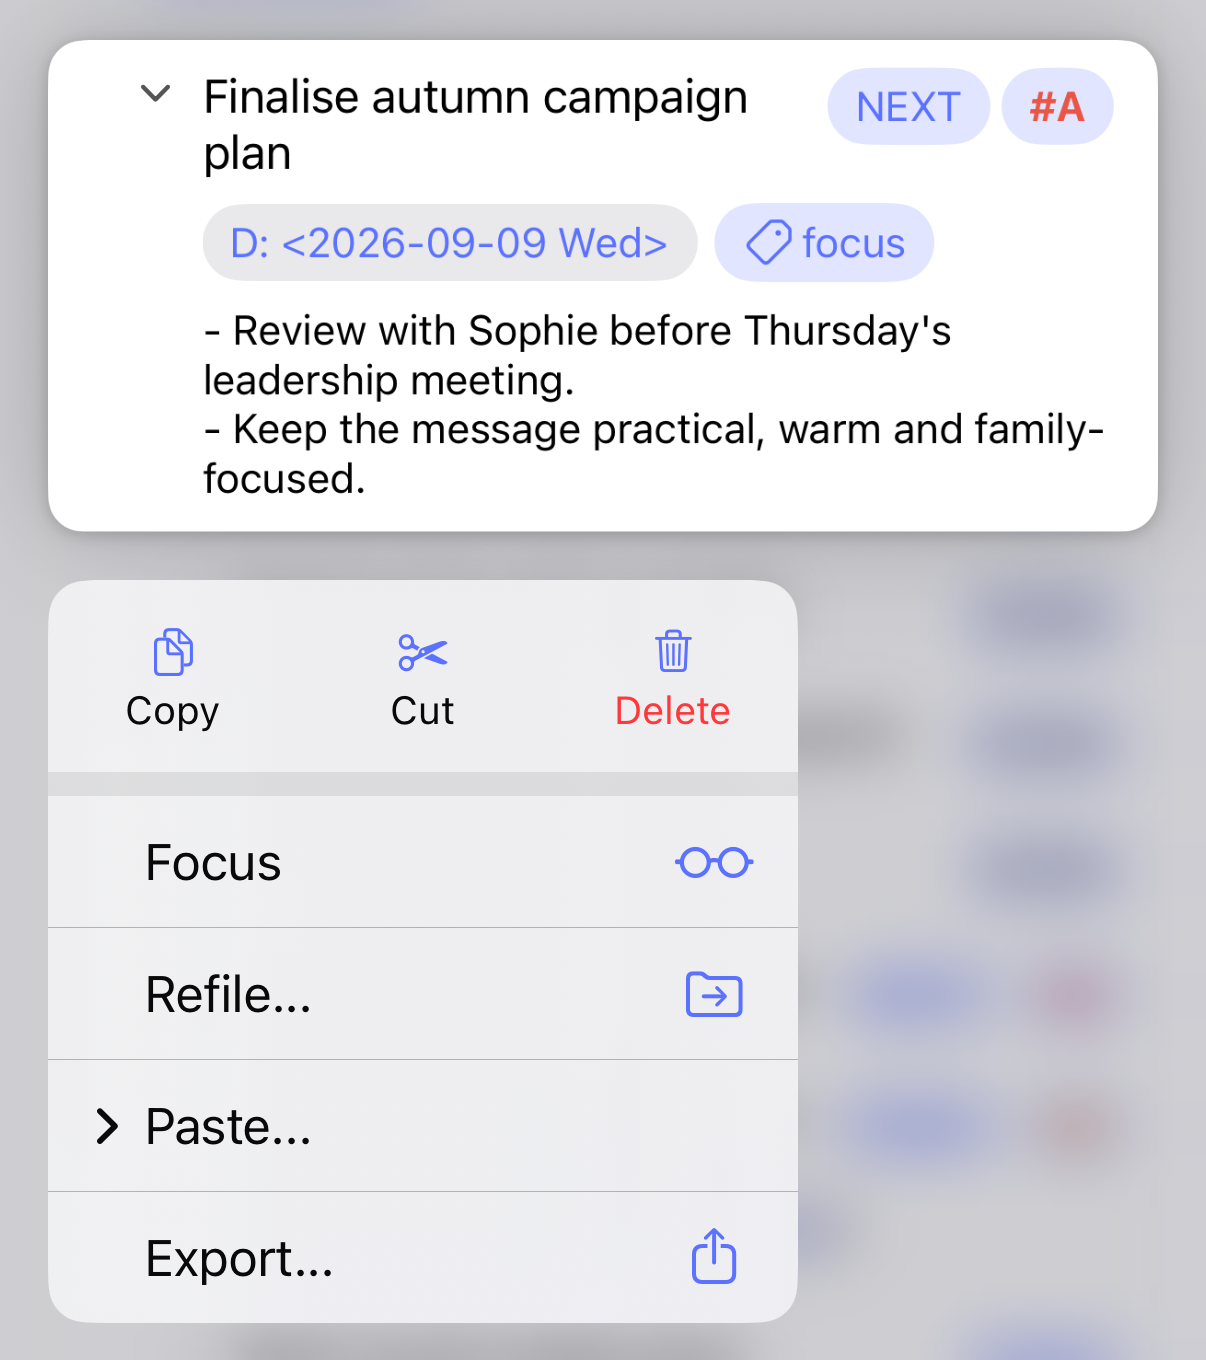
You’ll now see just the headline and its children.
At the top of the screen is a button to remove the focus and return to viewing the full outline.
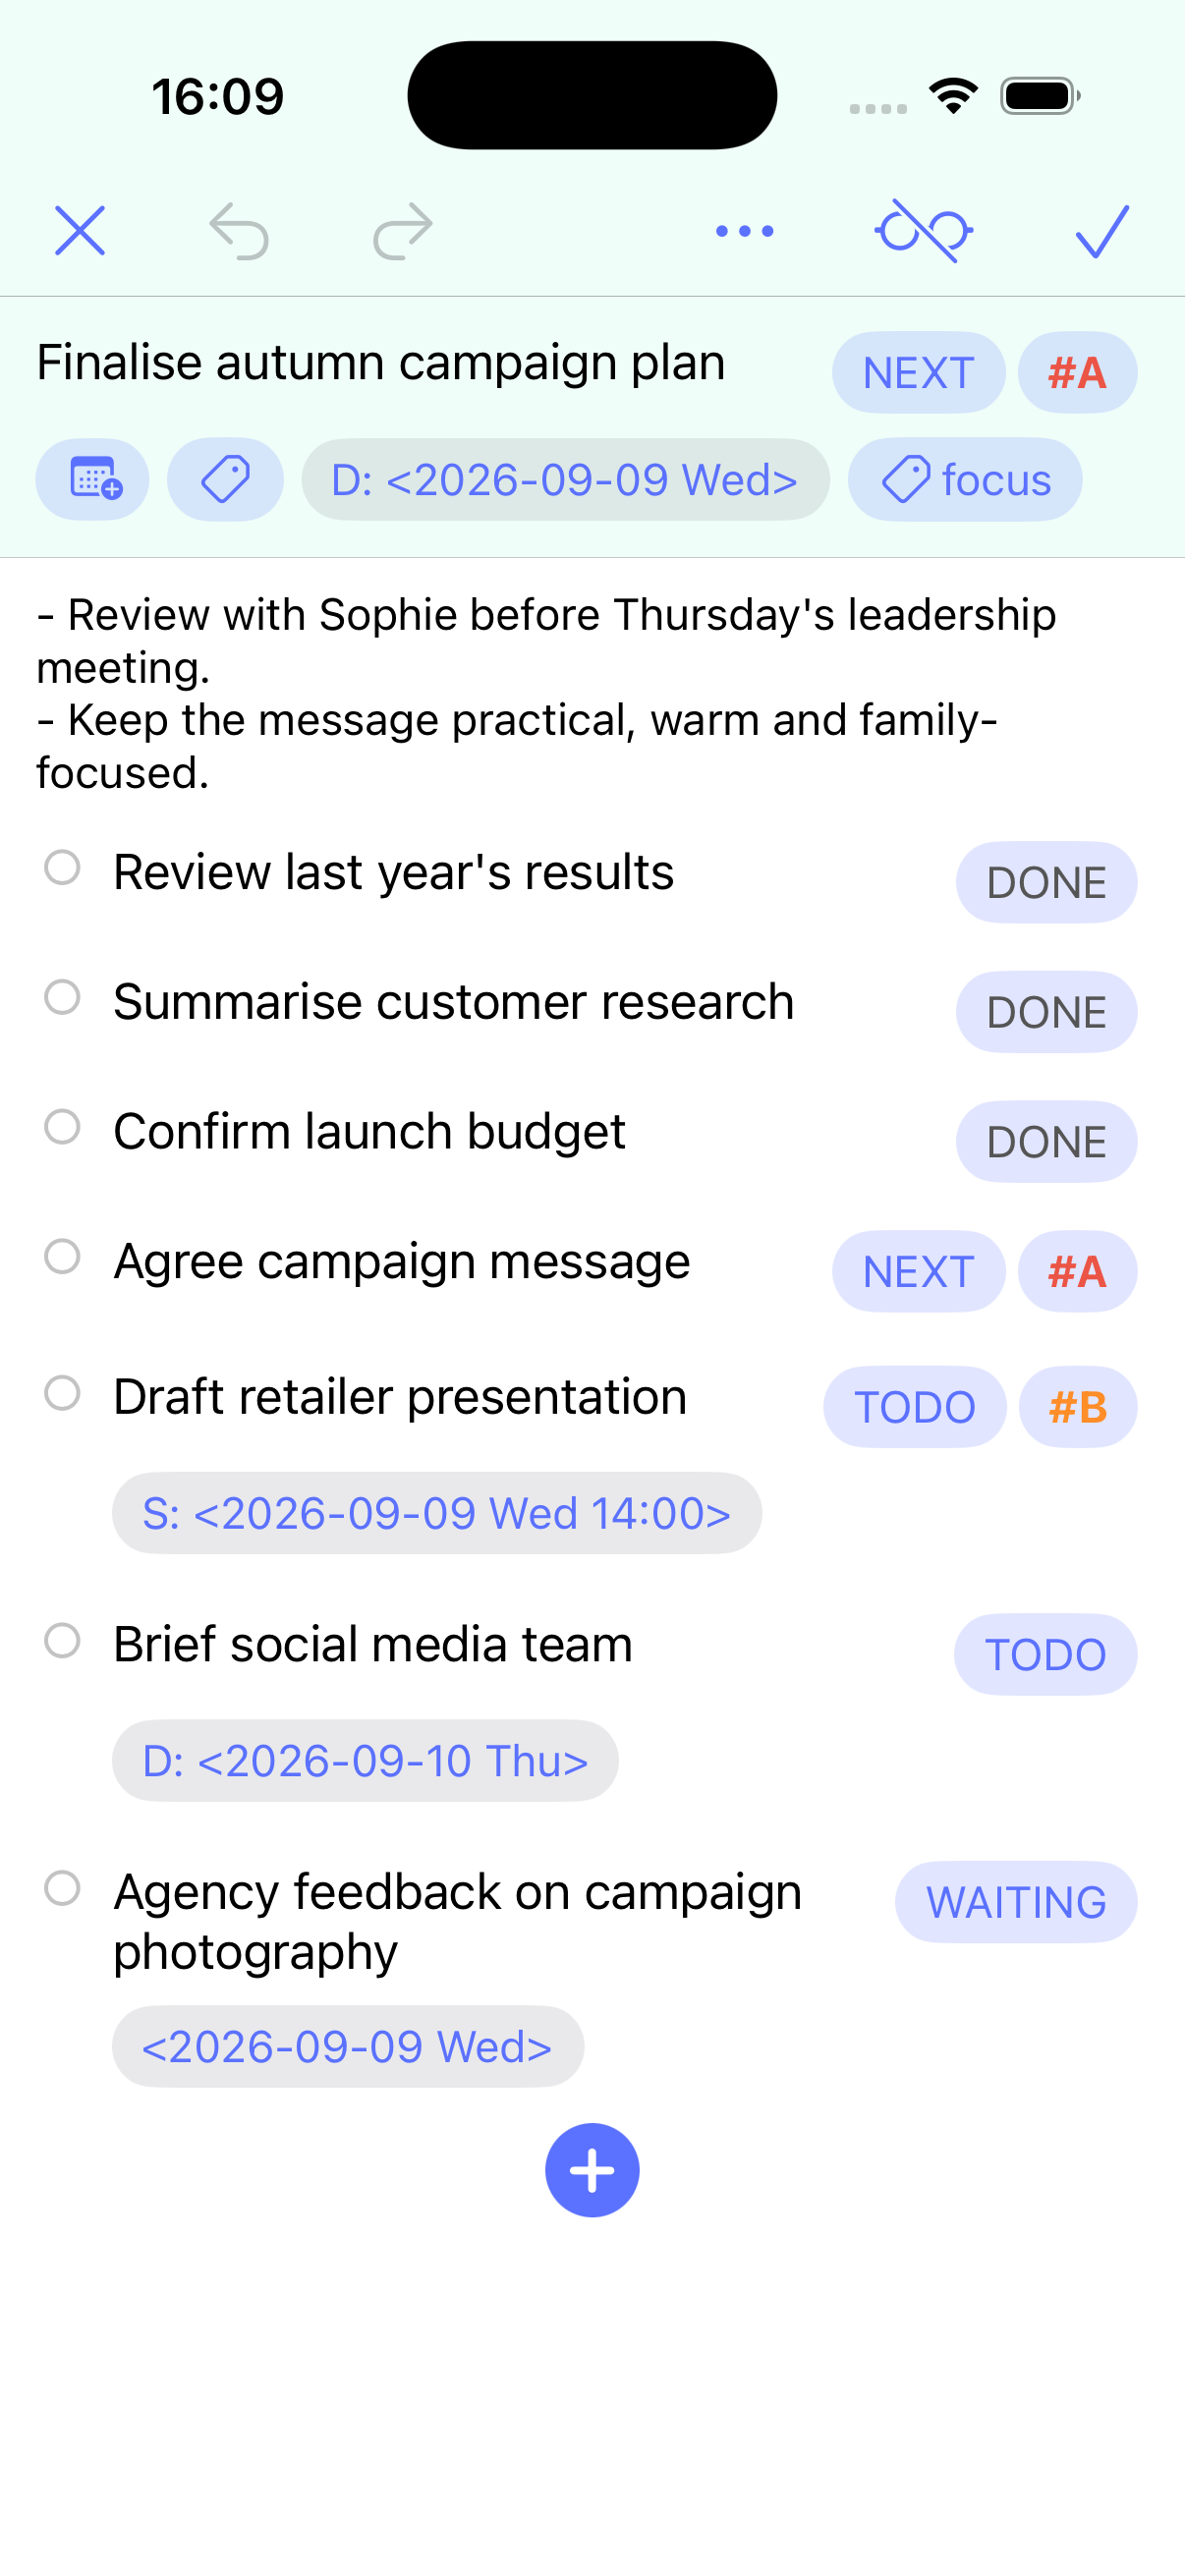
When you select a headline from the agenda or tasks tab it will be automatically focused.
Refile
Refile is a beorg extension. You can add this via an in-app purchase, or by being a beorg Premium subscriber.
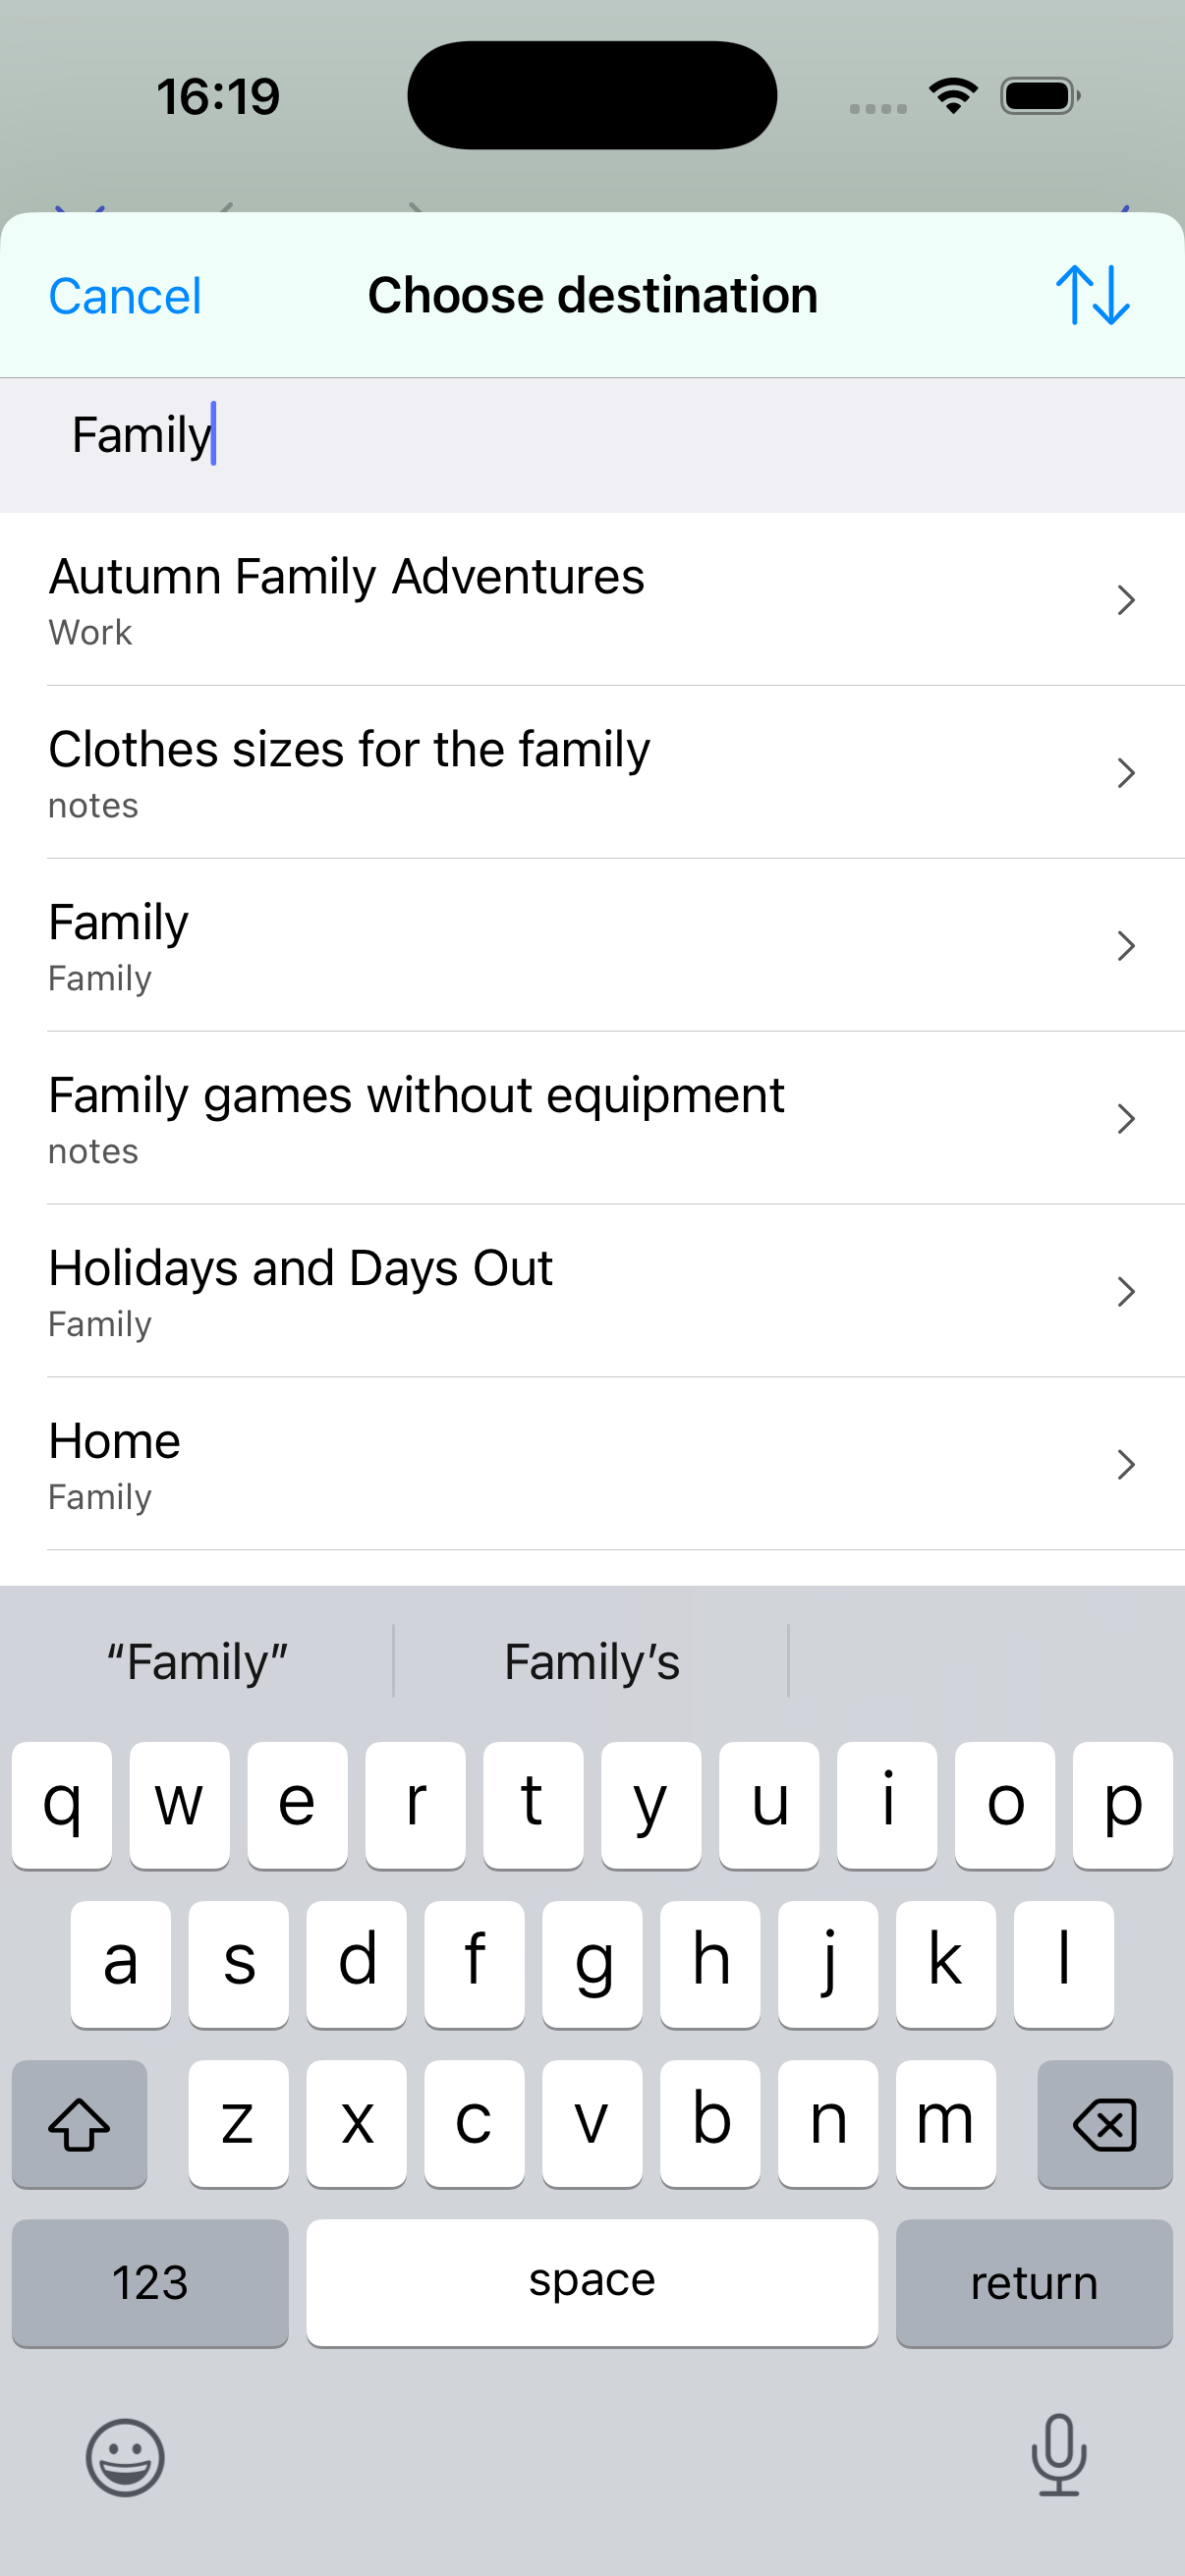
If you have a headline you think actually belongs in a different file, choose Refile… from the headline menu.
You’ll first be prompted to select a file.
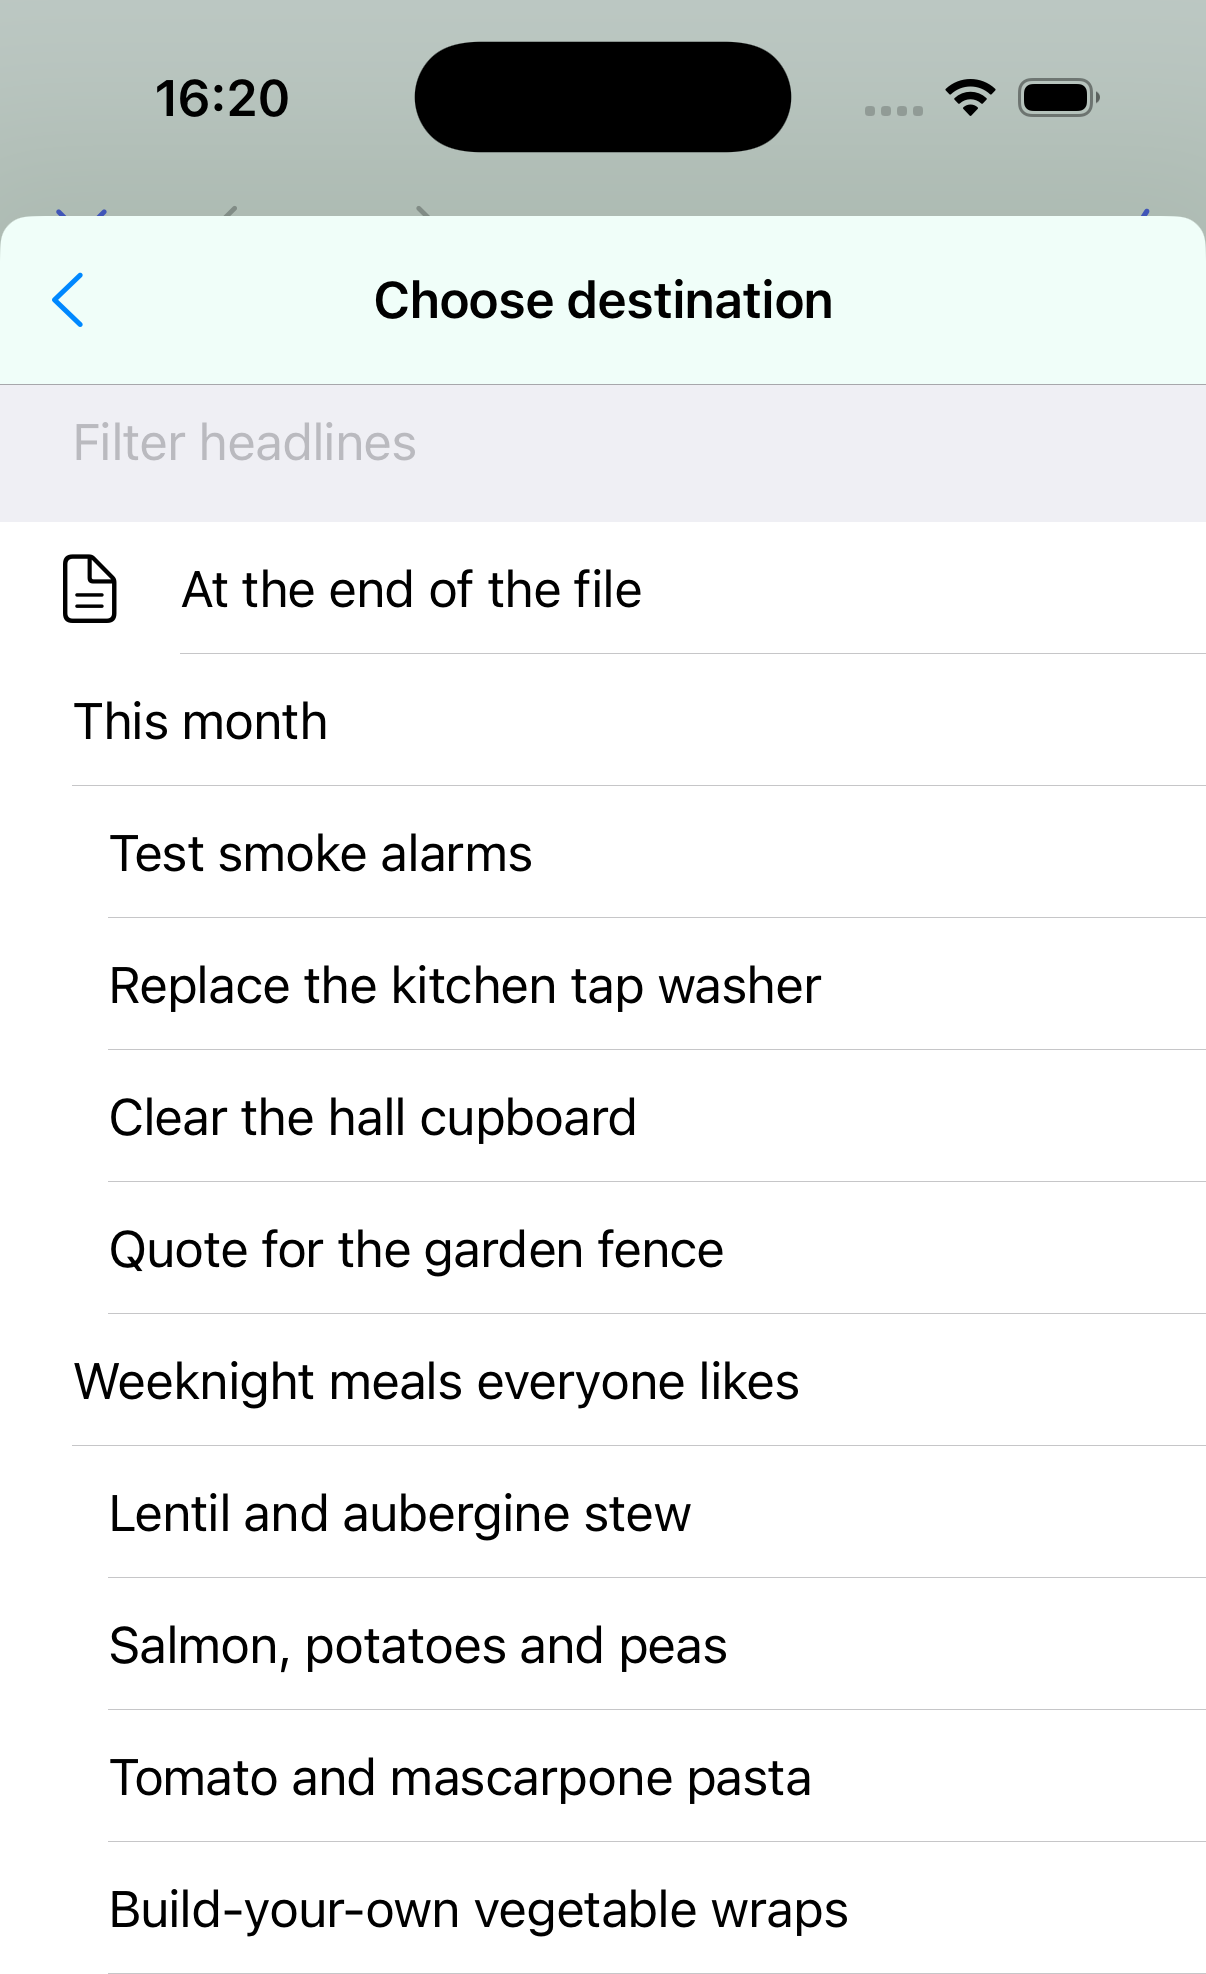
You can then choose to add to the end of that file or under a specific headline.
Refiling will move the headline (and its children) from the current outline and add it to the selected outline.
NOTE: You can undo this; however, the headline will still have been added to the destination. This can be useful if you are looking to copy the headline elsewhere instead of moving it.
Copy and paste
You can cut or copy a headline. This will put the Org mode text representing the headline and its children into the clipboard.
To paste a headline, long-press another headline, select Paste from the menu, and then choose whether to paste above, below, or inside.
Paste also works with any Org mode text you put into the clipboard—not just headlines from beorg.
Arrange
If you need to reorganize an outline, select Arrange from the menu at the top of the screen.
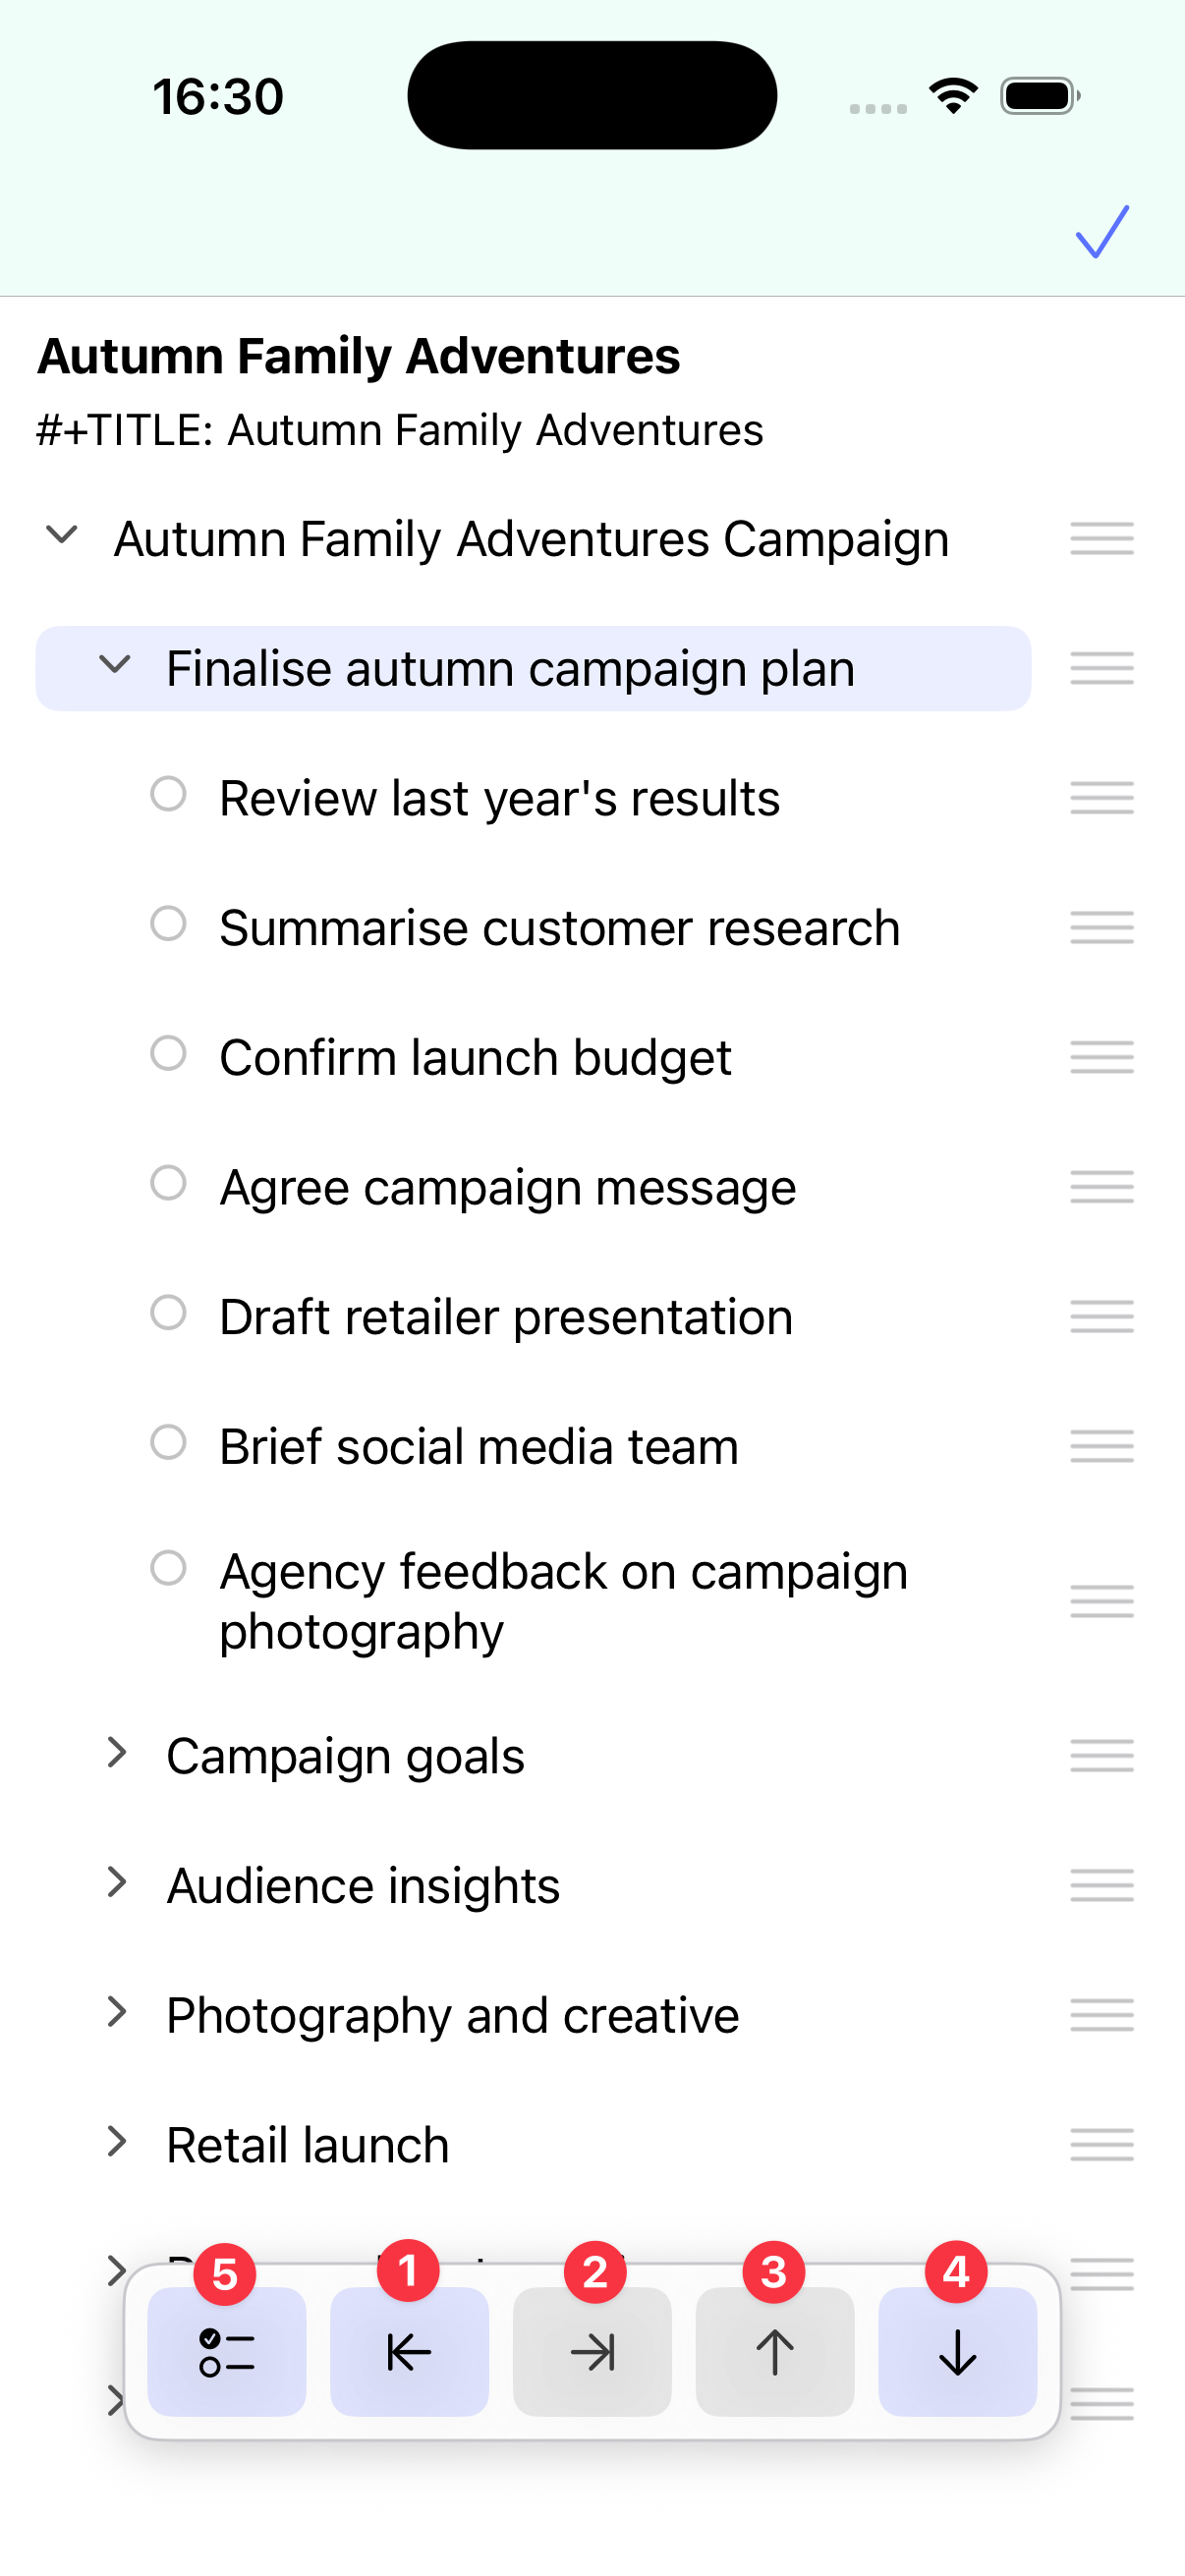
You can:
- Drag individual items
- Put a headline into a selected state, and then use the outdent (1), indent (2), move up (3) and move down (4) buttons
- Enable multi-select (5) and then use the outdent, indent, move up, and move down buttons to move multiple items at once.
Buttons will be disabled if they aren’t applicable to the currently selected headline.
To commit the new arrangement, tap the checkmark at the top of the screen.
Bulk editing
You can bulk edit multiple items at once, for example changing their state.
To enable this mode, choose Select Items… from the menu at the top of the screen. You can now tap headlines to add or remove them from the selection.
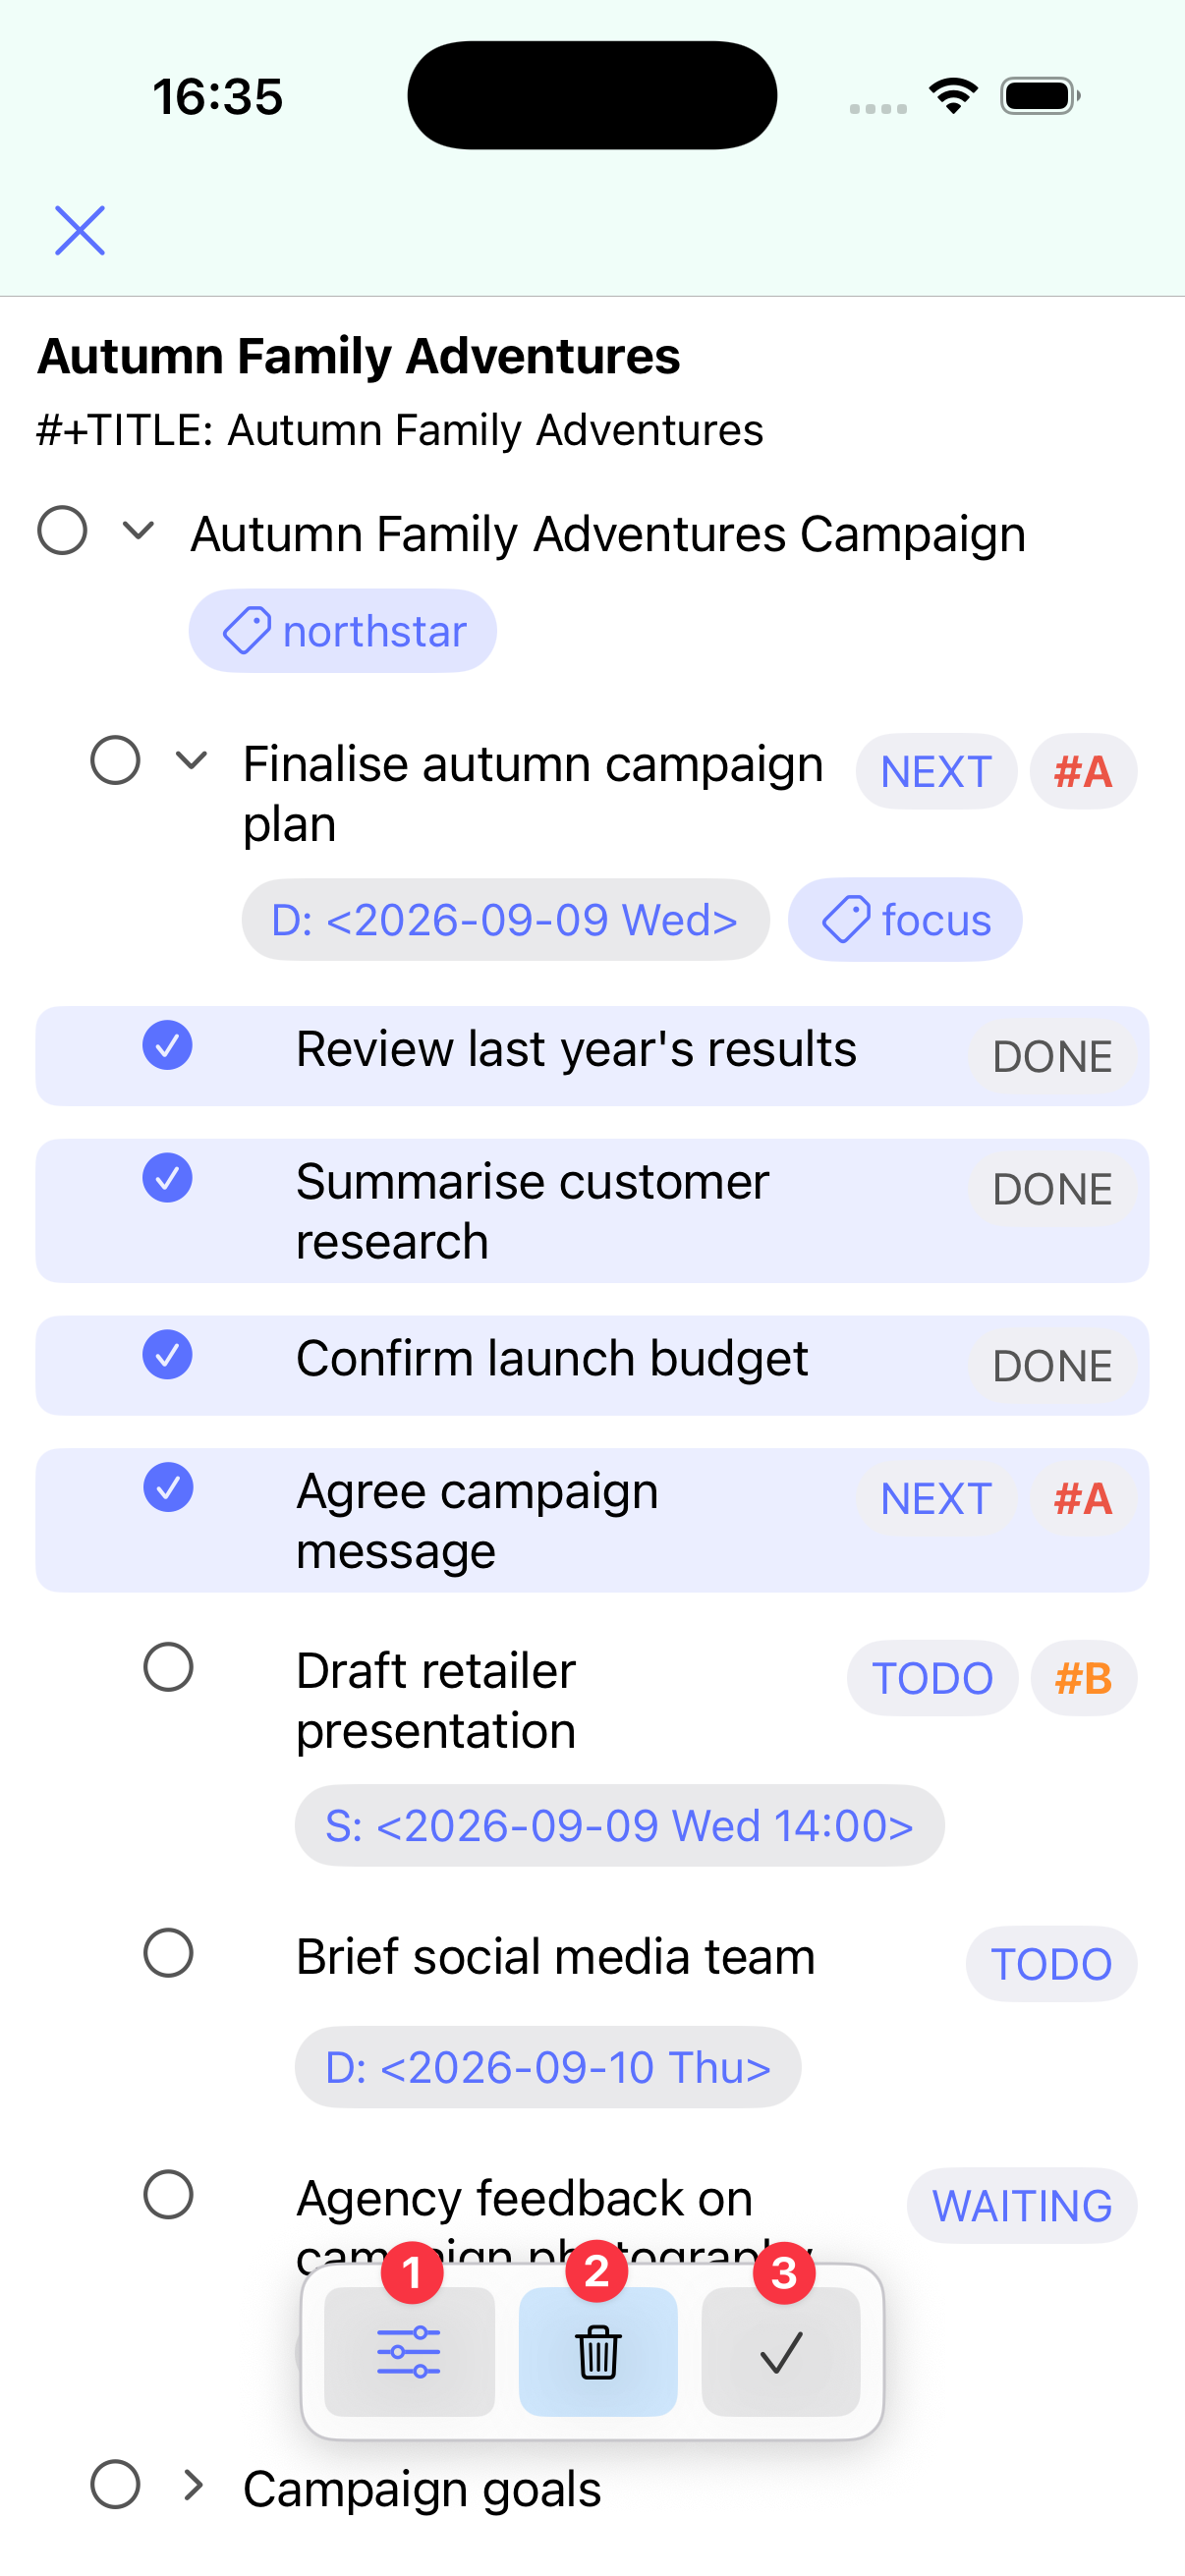
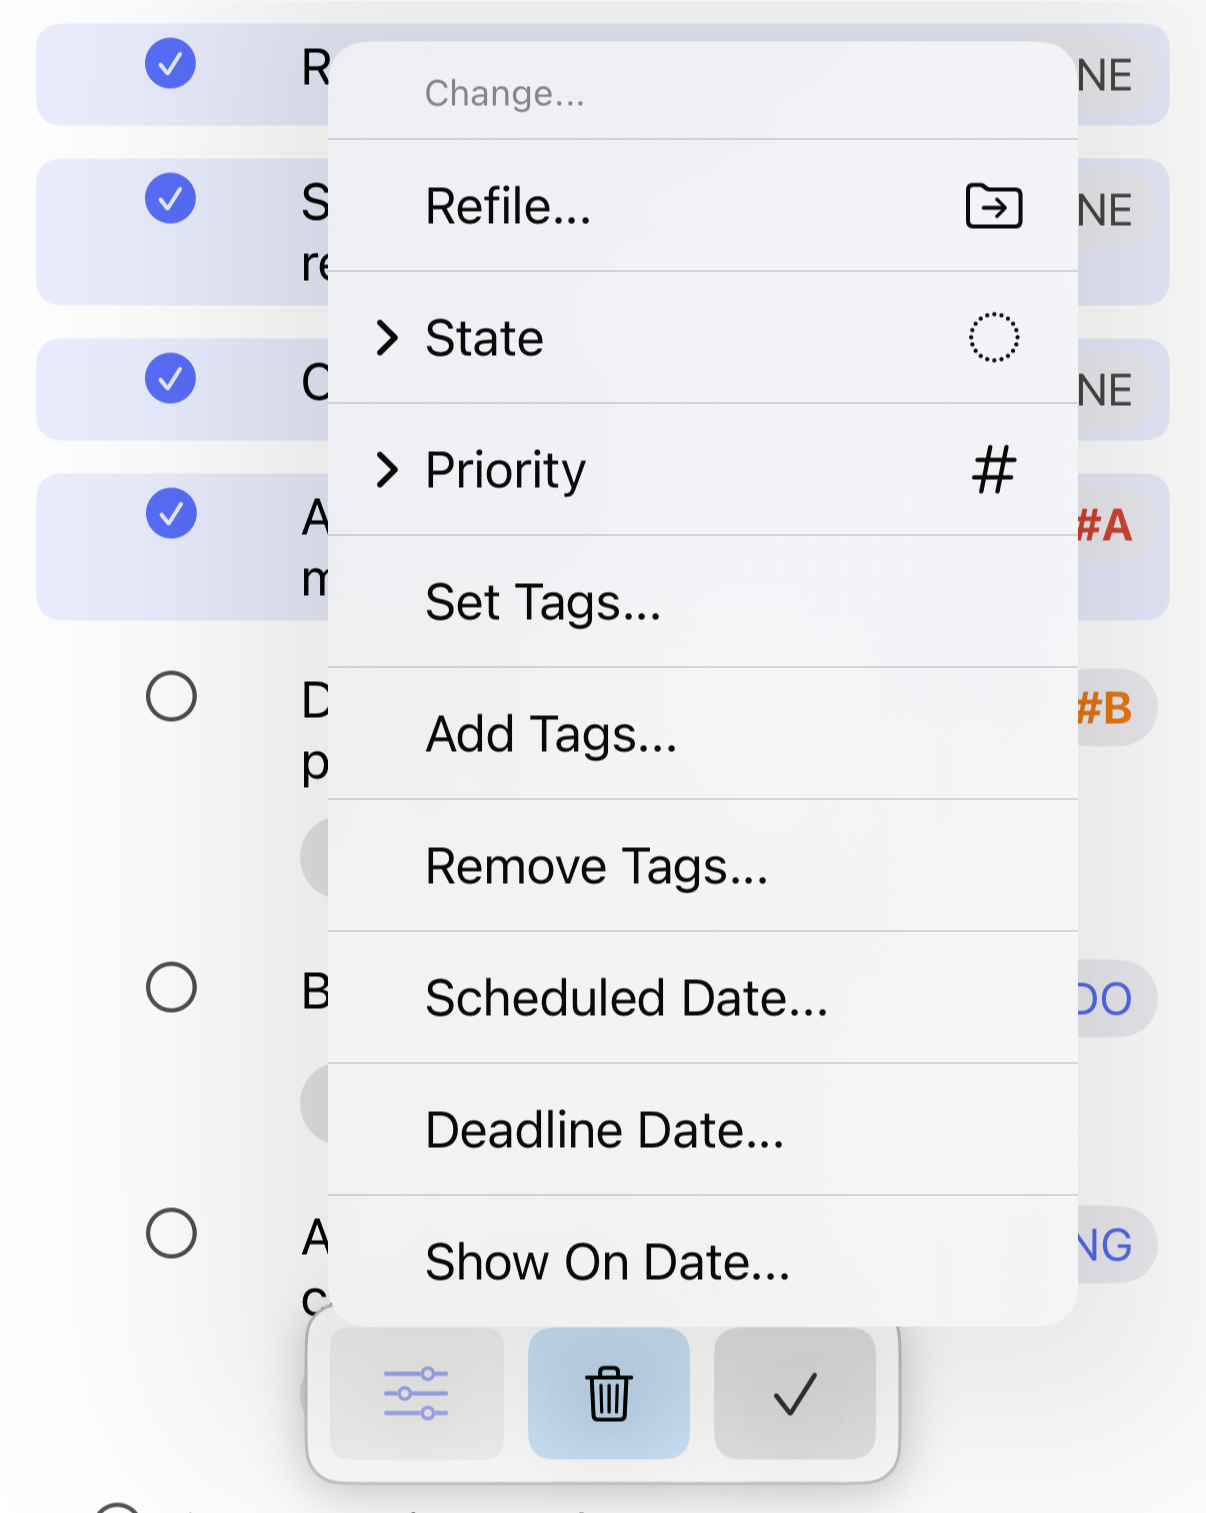
Once you’ve selected the headlines you want to modify, you can:
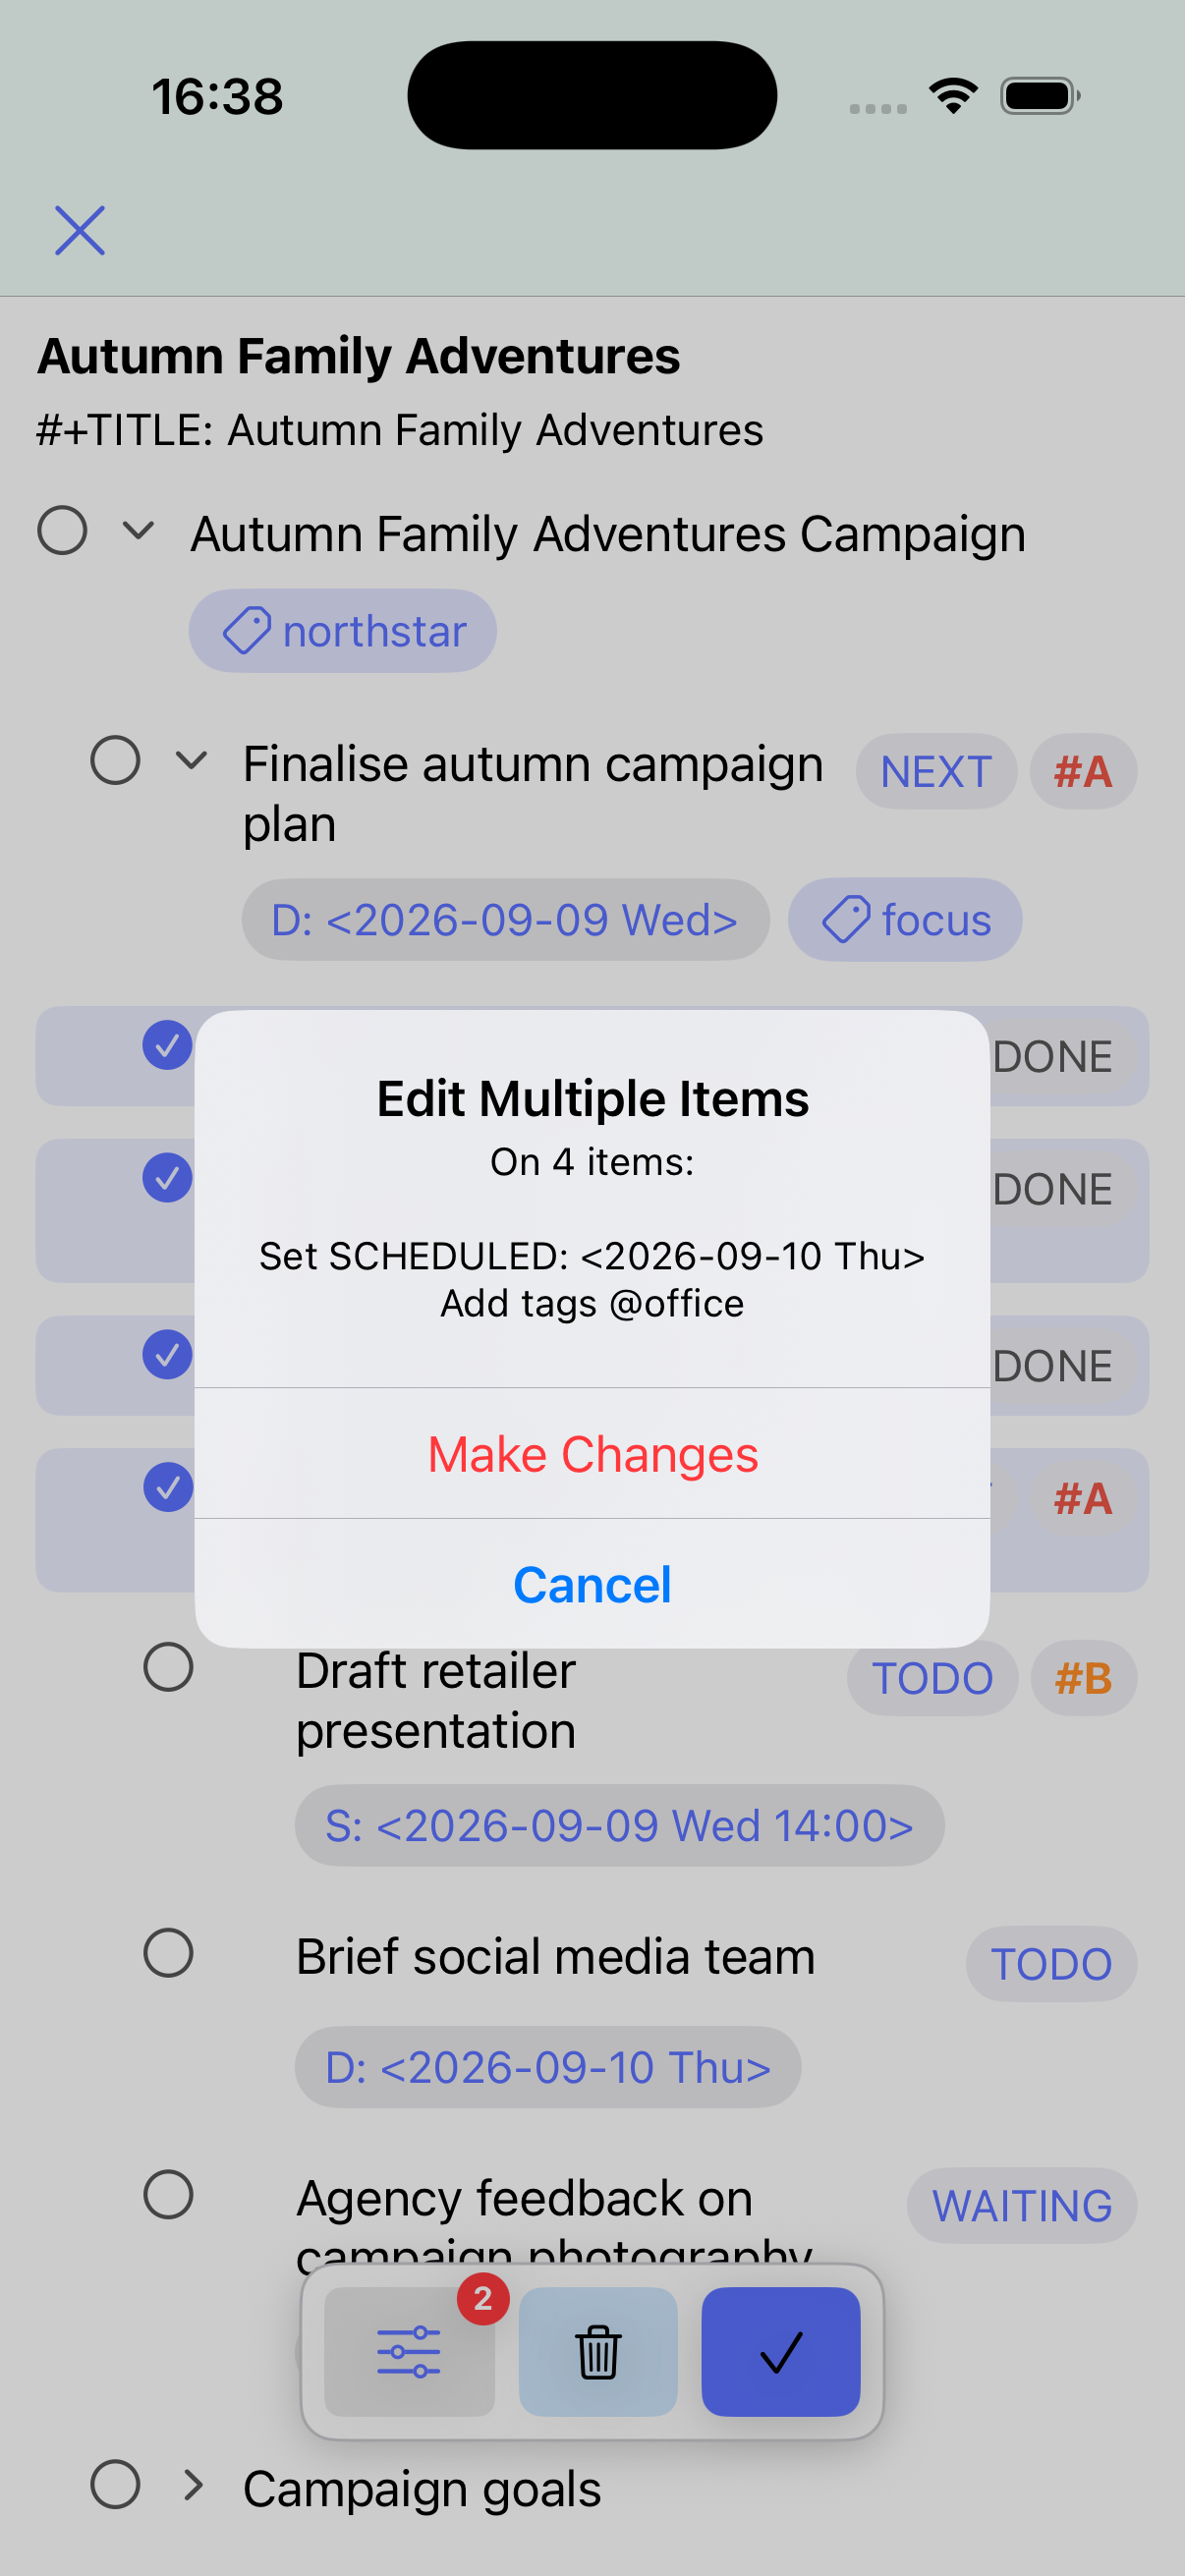
- Add changes to the set of changes to make. For example, change the state of the selected items to DONE.
-
Delete the selected items.
-
Commit the changes from (1).
Find and replace
If you want to find specific text in the outline, select Find and Replace… from the top menu.
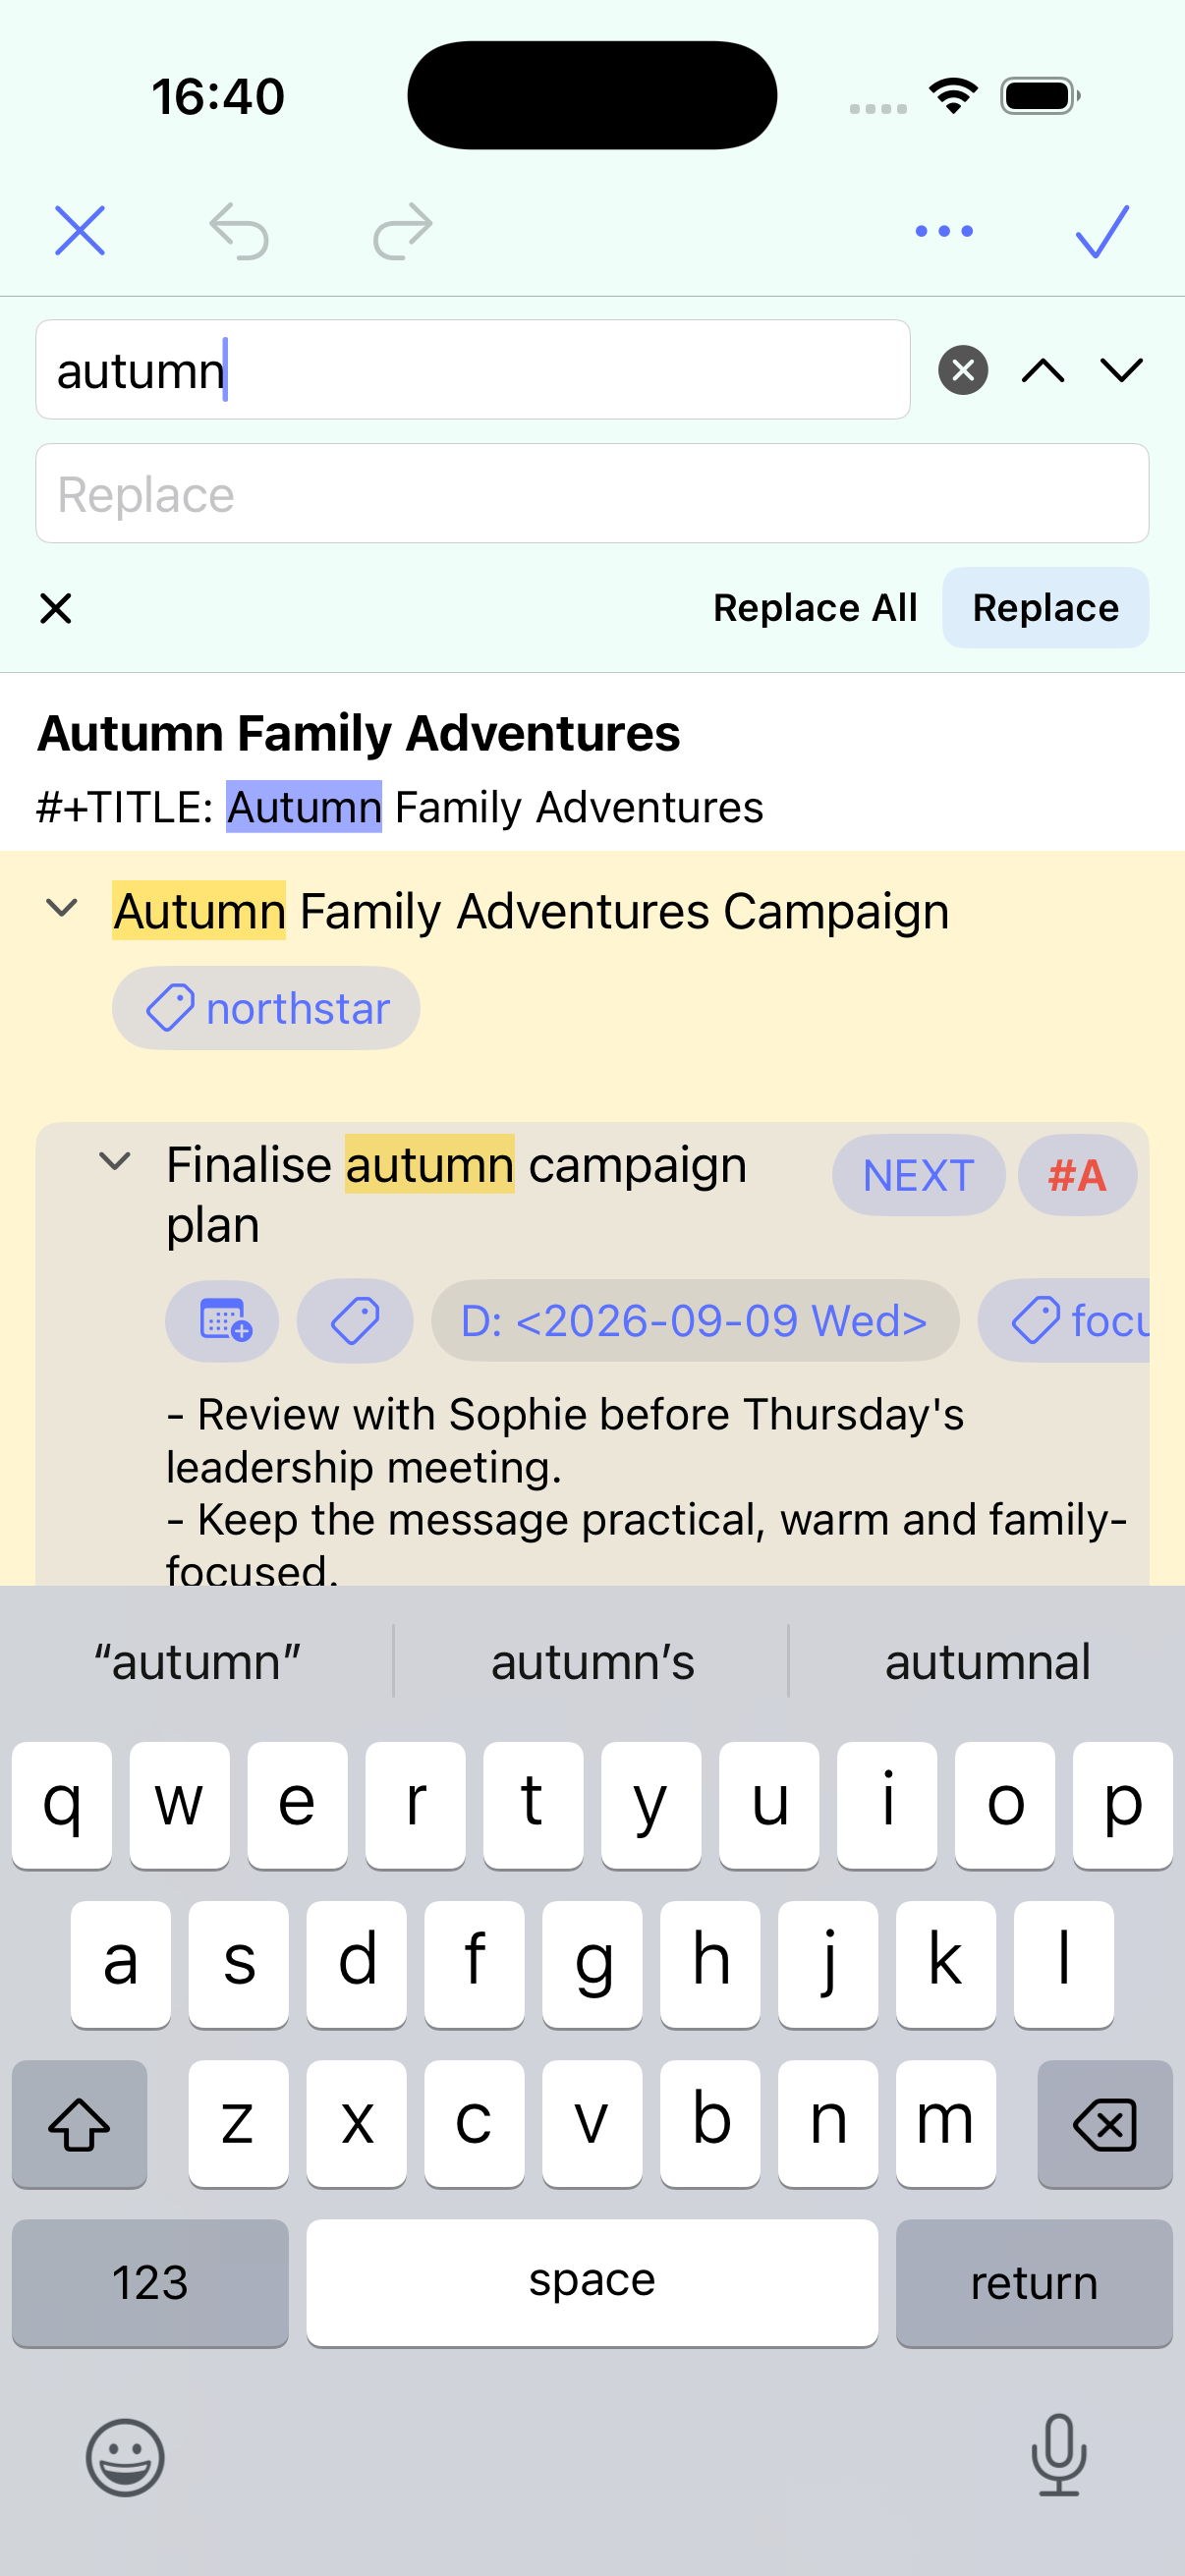
You can use the buttons to the right of the find text to move to the next or previous match.
To replace matches with different text, enter the text you want to replace the matches with and tap either Replace All or Replace.
When you have finished using Find, tap the small X to the left of Replace All.
Exporting an outline
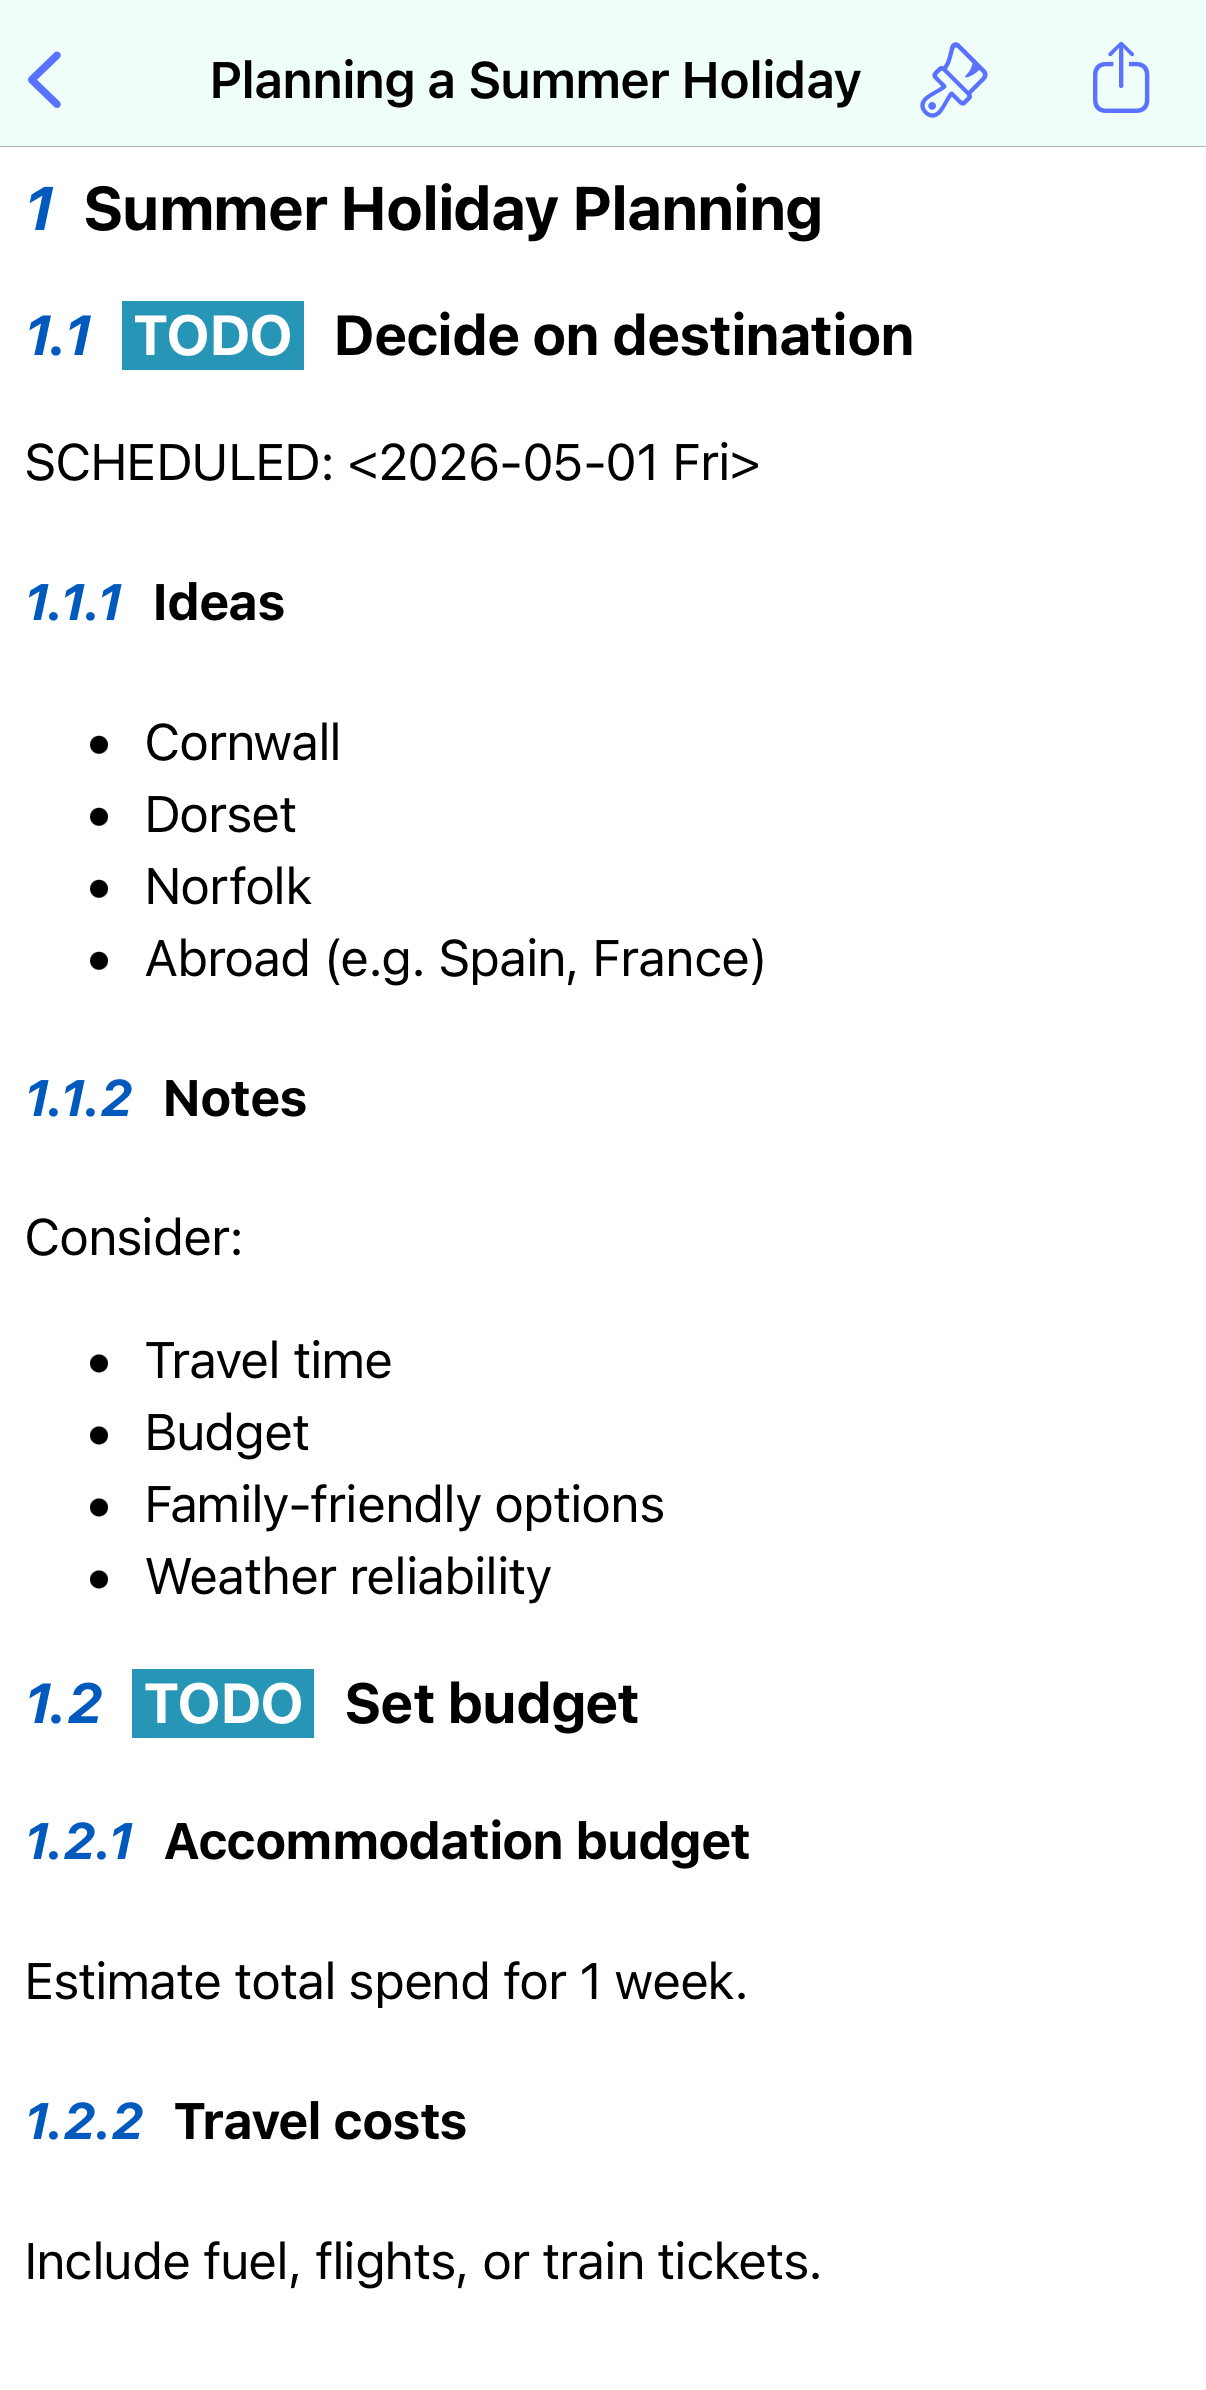
You can view a file as formatted text by tapping the menu at the top of the screen and selecting Export.
If you want to view just part of an outline as text, long-press the item and choose Export from the menu. The formatted view of the document or subtree can be exported as a PDF for printing or sharing via an app.
Undo/redo
Most outline-editing actions support undo and redo. These buttons are at the top of the screen and will be disabled when they aren’t applicable.