beorg has many different ways to sync your files. Choose folder was introduced in beorg 3.10 and allows you to chose a folder from iCloud, local storage or an app which acts as a file provider. In this tutorial we’ll get beorg to use a git repository via Working Copy.
This tutorial assumes that you’ve got Working Copy and beorg already installed.
The first step is to make sure that Working Copy is available as a file provider. Start the Files app on your iOS device and make sure you have the Browse tab selected and you’re on the first screen. Use the top-right pull-down menu and select Edit. If you see a much longer menu you probably need to press the back button a few times to return to the root Browse screen.
You should now see Working Copy listed as a location. Make sure that the switch next to Working Copy is on.

If you haven’t setup a repository in Working Copy you should do this now.
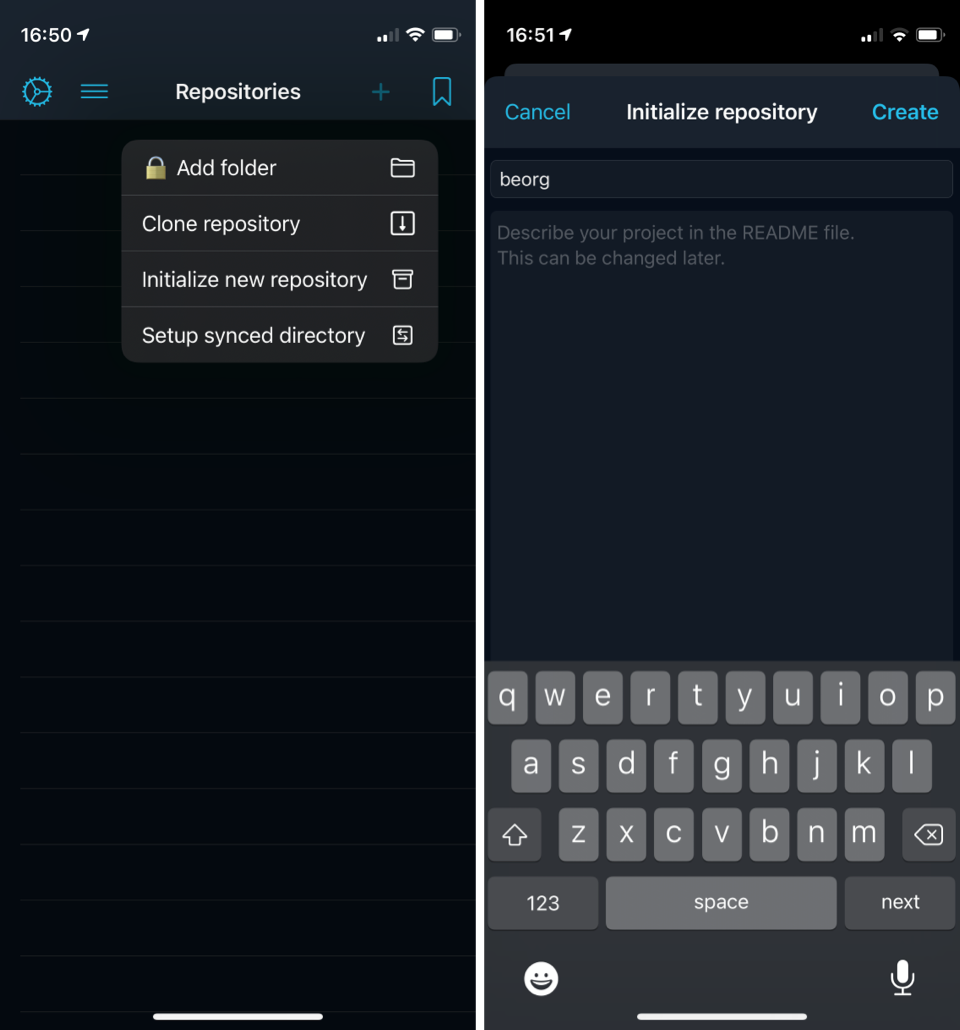
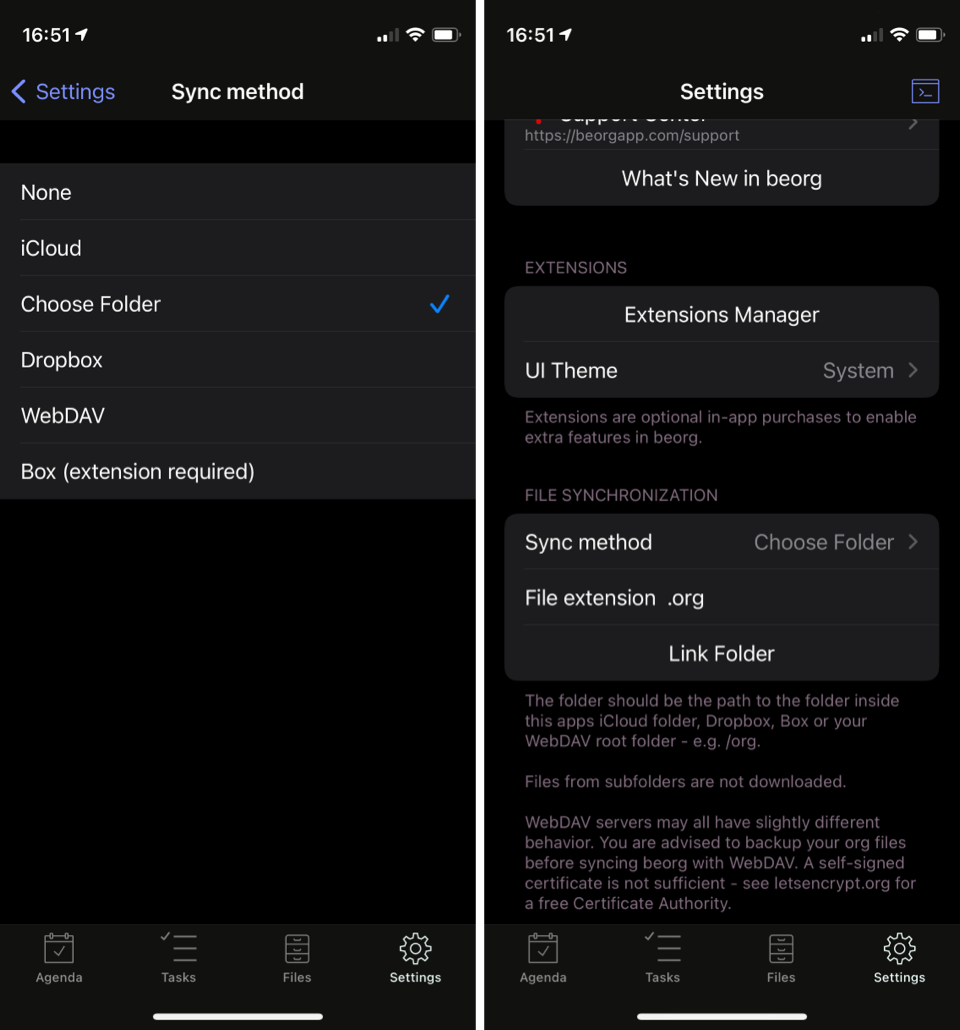
Let’s start beorg and configure the sync method to be Choose Folder on the Settings tab. When you’ve selected the sync method you need to tell beorg which folder to sync with. Tap Link Folder in the file synchronization section.
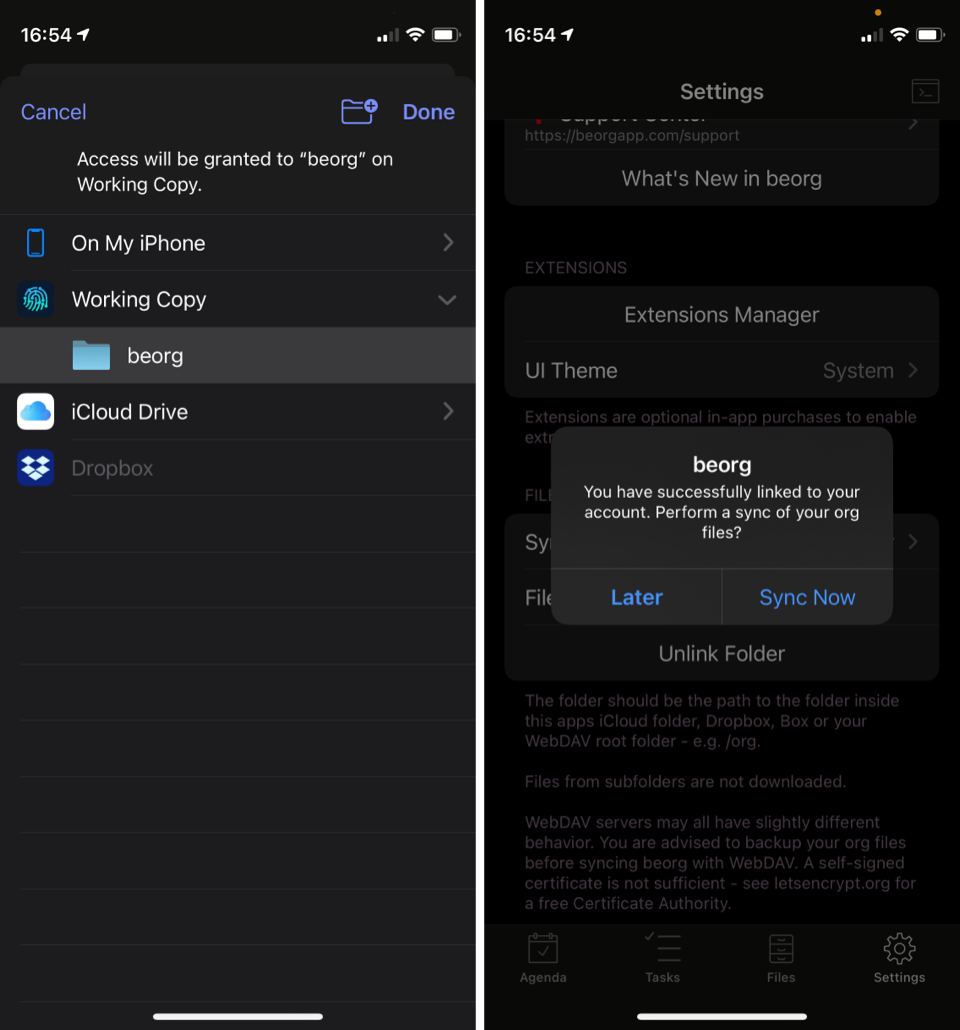
You’ll now see the list of places from which you can select a folder to sync with. If you don’t see Working Copy in the list you may need to tap the back button a few times to reach the locations list. Working Copy will represent each repository it knows about as a folder.
When you tap the Done button beorg will ask you if you want to Sync Now. Tap this even if the repository is currently empty.
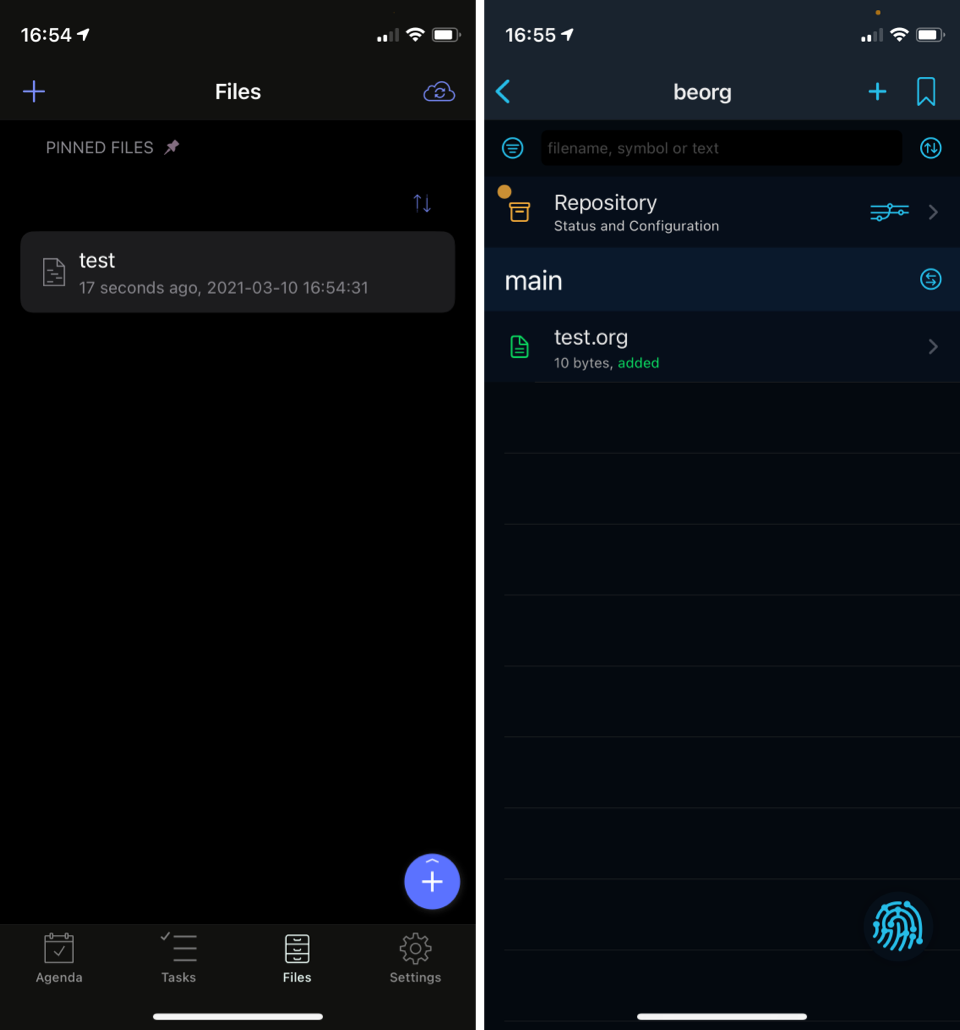
beorg will now sync files between it’s own local file storage and the Working Copy repository. You’ll need to go back into Working Copy to commit, push or pull.